Showing posts with label Feeding. Show all posts

Monday, October 6, 2014

Molting Season...I'm Collecting More Feathers Then Eggs These Days


[Goldie (Buff Orpington) in molt, new feathers coming in and old ones falling out.]

With the days growing shorter and the girls all over 1 year old, its raining feathers around here.  I could seriously stuff some big pillows, but they would be a little pokey.  The girls look just awful...talk about your worst hair day!  This is our first molting since the girls are so young.  Thank goodness I've studied up on chicken keeping because I didn't remember it being this bad when I was a kid.  Of course as a kid I probably just had fun catching the feathers blowing all around.

Just look at these girls...awful!

[Barbara (Barred Rock in center), Buffy (Buff Orpington in back), Snowball's butt (White Rock)]

Talk about bad hair day...look at Barbara with feathers falling off of her everywhere. Her head is looking so much nicer as the new feathers come in.

[Barbara (Barred Rock). See the loose feathers everywhere?]

Buffy is nearing the end of molting with just her butt bare, but with new feathers sprouting there...

[Buffy's finally down to mostly just the butt area in full molt.]

If you look closely at Goldies butt...yeah I know you probably don't want to but look anyway...she has a bunch of new tiny feathers poking out all over.  

[Goldie has a bunch of new feathers poking out of her bare rear-end.]

My poor girls are still laying, but they have slowed way down.  I swear I find more feathers then eggs in the nest boxes every day.  I just keep picking them out when I collect their eggs.

[Egg production down, feather production up!]

To help the girls ease through this phase without completely depleting them nutritionally, I have upped their protein.  We are still getting about 6-8 eggs a day from my 16 girls, so I can't complain.  The neighbor down the hill from us isn't getting any, his chickens just stopped laying all together.

I've had to put a halt on selling eggs to anyone other than my long time regulars, because there aren't many left after we have our breakfast.  Just this morning I was short an egg for breakfast so I had to go out and steal one hot off the presses, the bloom was barely dry when I grabbed it.  Talk about Fresh!!

As I said, I've upped their protein by adding some dried split peas or wheat berries to their fermented feed.  They also get some dried meal worms in the afternoon, and of course they get to come out and hunt down whats left of the grasshoppers and other critters before they go to bed for the night.  How are you helping your girls make it through the molting season?

Keeper of 1 husband, 3 dogs,
3 cats, and 16 Chickens!
 
Follow on Bloglovin

http://www.Facebook.com/backyardchickenlady
 .

Thursday, September 11, 2014

I Grow Wheat Grass for 17 Chickens for Less than 25 Cents a Day - Instructions

Last year I shared with you one of my fodder growing experiments.  It didn't turn out so well, but I continued to play with several of the factors that made it less then wonderful, such as the kind of seeds I would grow, the trays needed for optimum sprouting and ultimately grass growing, temperature and location of my trays, and finally the rotation schedule that would provide me with the exact amount of feed I would need every day for my hens.

All of my experimentation has helped me develop a master-plan that I would like to share with you.  I've been using this plan successfully for almost a year.  With this method I can grow enough Organic Wheat Grass to feed (as a supplement) to my 17 hens during the times of year when access to fresh grass is not an option...which is most of the year here in ArizonaI can do this for less than 25 cents per day!  This does not include the initial cost of my supplies however.  If you want the same supplies I used, I have included links to purchase these items online, below.


Beautiful Organic Wheat Grass in Various Stages of Growth

Here are the detailed instructions for my super-easy, proven method:


First, I bought Two (2) Victorio Seed Sprouter sets - that gives me a total of 8 round sprouting trays.   I have six trays in my rotation at all times and two trays are cleaned and ready each new day.


Next I bought the big trays I use for days 4 thru 9.  You will need Three (3) Large Trays Without Holes and Six (6) Half-Size Trays With Holes.  I bought an extra couple so I don't have to immediately wash out the tray emptied each day, but it really isn't that much of a chore.  I figured I could use the extras for my garden seedlings.  The reason I don't use these black trays from the beginning is because, until the seeds sprout, they can too easily fall thru the drain holes, and they also sprout better in the round Victorio trays in my opinion.  (Click the title under each image to be taken to the Wheat Grass Kit website to purchase the trays.)

Large Trays WITHOUT Holes

Small (10"x10") Trays WITH Holes
I use Organic Hard Winter Wheat Berries (seeds).  I purchase my seeds through a co-op bulk feed group here in Arizona for about $16 for a 25 pound bag.  If I run out before the next order time I also purchase them in the bulk section of my local natural grocery for $ .99 per pound.  Yes, I could buy it much cheaper at the feed store BUT, it wont be Organic, Non-GMO which is all I will feed my hens.  For less than 25 cents a day I am not concerned about the cost to purchase the best seeds possible.  I have also found through my experimenting that the standard bulk seeds which are not organic do not sprout as well so you are using lots more seeds and getting less growth...where is the savings in that?

Here is my routine:

If you start with Day 1 step (below) each day, by the time you get to the 10th day you will have a 10" x 10" patch of lush green wheat grass to feed your chickens.  Keep it up and you will always have a fresh batch daily from there on out.

1/3 Cup of Organic Hard Wheat Berries (seeds)


DAY 1: (and each morning thereafter)
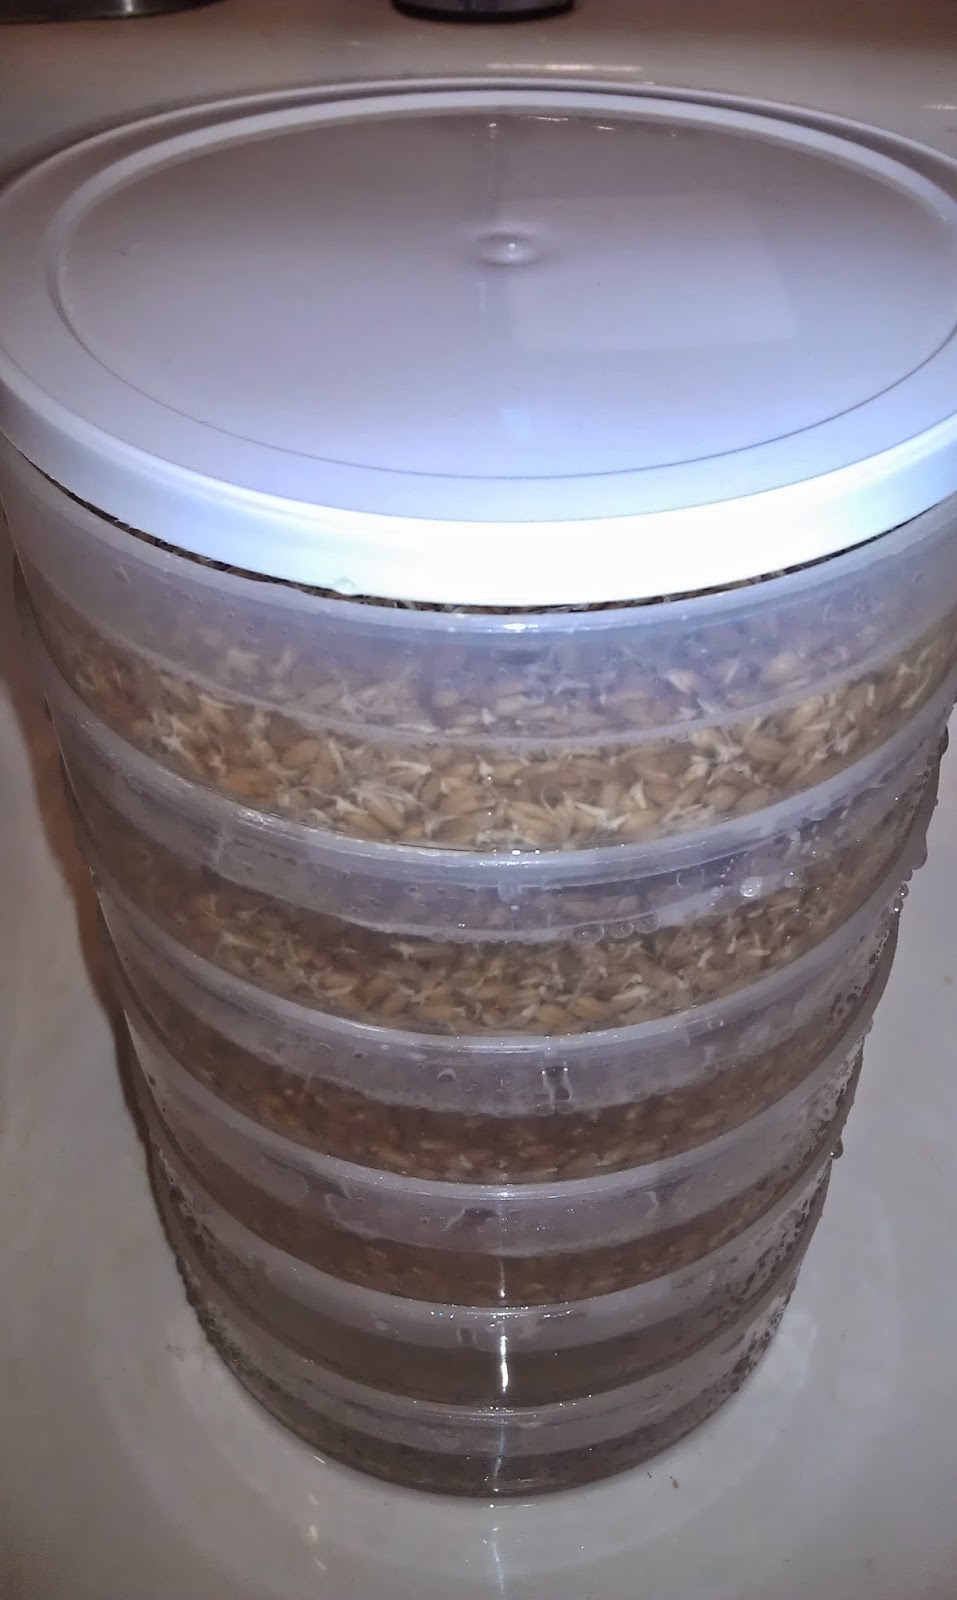
Each morning you will be starting a new set of round trays.  Put 1/3 cup of wheat seeds in each of 2 round Victorio sprouting trays.  Rinse them thoroughly under cold running water, then allow to drain. The theory is "Flood & Drain".  After I rinse the new seeds thoroughly I put these two trays on the bottom of my existing stack of trays. (Note: when you first start you wont have an existing stack, but by day 2 you will.)

I place the whole stack of trays into the sink and slowly run cold water into the top tray, and allow it to run until all of the trays are full of water.  Then I lay the lid on top -but do not snap it down, if you do it can cause molding because they cannot drain.  While that is draining I rinse out the holding tray (that's the bottom white tray without holes).  Once the water has pretty much drained out of the trays, I put the whole stack (6 trays by day 3 and each day thereafter) on top of the white holding tray and place it on my counter out of my way.

In the evening I will 'flood and drain' all trays again.  The seeds should be rinsed approx every 12 hours, it's not exact, I do it in the morning, then sometime after dinner or before bed.

Six Trays Full, draining.


DAY 2:
Repeat Day 1 using 2 new round trays of seeds.  After thoroughly rinsing the new seeds,  stack all round trays from the day before on top and fill them and rinse all of them by slowly filling the top tray with cold water and allowing the water to drain down thru all trays.  Once drained, rinse the white holding tray then, stack all trays on top, lay the lid on the top tray.

Repeat the evening rinse.

DAY 3:
Repeat day 2.  You should now have 6 round trays with seeds/sprouts stacked up with the oldest sets on top and the newest seeds on bottom.

DAY 4 (and daily after this point):
Dump the two round trays of sprouts on top, into one of the black half-size trays. Gently spread the sprouts evenly over the bottom while running cold water over the sprouts.  Thoroughly rinse (flood & drain) the sprouts and allow most of the water to drain from the tray before placing it into the large tray without holes.  Be sure to rinse the large tray without holes before placing the freshly drained half-sized trays back in it after each flood & drain session - this helps to prevent mold growth.

I keep my big trays on a shelf, under a standard shop light in my laundry room, however they will grow almost as well with a bright window exposure, but they tend to lean towards the window.  Simply rotate their direction at each rinsing if that is a problem.

Repeat Days 1 thru 3 in the round sprouting trays. 

Rinse all trays again twice a day.

DAY 5:
Repeat Day 4. You should now have two half-size trays in one large tray, plus maintaining the 6 round sprouting trays.

DAY 6:
Repeat Day 5. You should now have three half-size trays actively growing, plus maintaining the 6 round sprouting trays.

DAY 7:
Repeat Day 6. You should now have 4 half-size trays actively growing, plus maintaining the 6 round sprouting trays.

DAY 8:
Repeat Day 7. You should now have 5 half-size trays actively growing, plus maintaining the 6 round sprouting trays.

DAY 9:
Repeat Day 8. Today you should have 6 half-size trays actively growing in various stages as seen in the picture below, plus maintaining the 6 round sprouting trays.

Grass in Various Stages of Growth


DAY 10:
Gently pull the roots up out of the drain holes in your tallest grassed half-sized growing tray and drop the whole block in the chicken pen.  If you want to split it among your birds you can gently pull it in half, but it isn't necessary, they tear it apart pretty well themselves.  Wash this tray out (or use a clean tray) to repeat starting from Day 4.

You now have all trays full and each new morning you will have a fresh block of Organic Wheat Grass for your chickens!  You can 'mow' this grass and use it to make your own healthy green smoothies too!

Just keep it going and you will never run out.

Keeper of 1 husband, 3 dogs,
3 cats, and 17 Chickens!
 
Follow on Bloglovin

http://www.Facebook.com/backyardchickenlady

This post was included in the HomeAcre Hop at Pint a Size Farm where I am entry #83, and in the From the Farm Blog Hop where I am entry #104..

 .

Friday, August 22, 2014

My Mini-Scale version of Fermenting Chicken Feed

Last year I shared with you how to make your own fermented chicken feed, and I have continued to feed my 'girls' fermented feed, but it can be difficult, if not impossible, to keep the fermented feed from spoiling with our erratic work schedule.  We are self-employed in the property rental business so we don't keep regular hours.  If we have a tenant move out then we may have to spend several days away from home to prep the house or commercial building for a new tenant, or if something breaks we may have to make an unscheduled trip to that location to fix the problem.  Which has resulted in my fermenting going bad a time or two because I was not home to tend to it.  And Boy is that Stinky!

The only alternative is to feed them the full amount that is currently in the jar before we leave, which could be several days worth.  It wont go to waste because they will just eat it and not their dry feed in these instances, but it just seems wasteful to me.  When we are away (and aren't taking the chickens with us) we have a friend chicken-sit for us, but I cannot expect her to monitor my fermented feed for me...you develop a feel for how to maintain it, so it's just too much to ask someone unfamiliar with it to step in and do it.

Over time I have learned exactly how much feed it takes each day to feed my 17 hens (fermented feed is about half of their primary food, they also have dry feed available), so now I ferment my feed on a scaled down basis, meaning I only have on hand what will be needed for one day.  This 'mini-scale' version works very well for us, and it would work for those of you who don't have a large flock and don't want to have a full-scale fermenting operation in your kitchen.

So instead of my previous set up where I used a huge 3-1/2 gallon jar on my counter (or the two bucket system I occasionally used outdoors during cool months) that I added more feed and water to each day after I scooped out their morning meal, now I just keep a 2 gallon jar by my kitchen sink.


Each morning I reserve most of the liquid from the fermented jar when dumping the contents of fermented feed into my draining tray.


Then I pour the fermented liquid back into the jar with what ever little bits that remained in the jar after pouring it out.  I don't wash it out, because what ever is left in the jar, along with the reserved liquid, and this jump-starts the fermenting process for the new day.


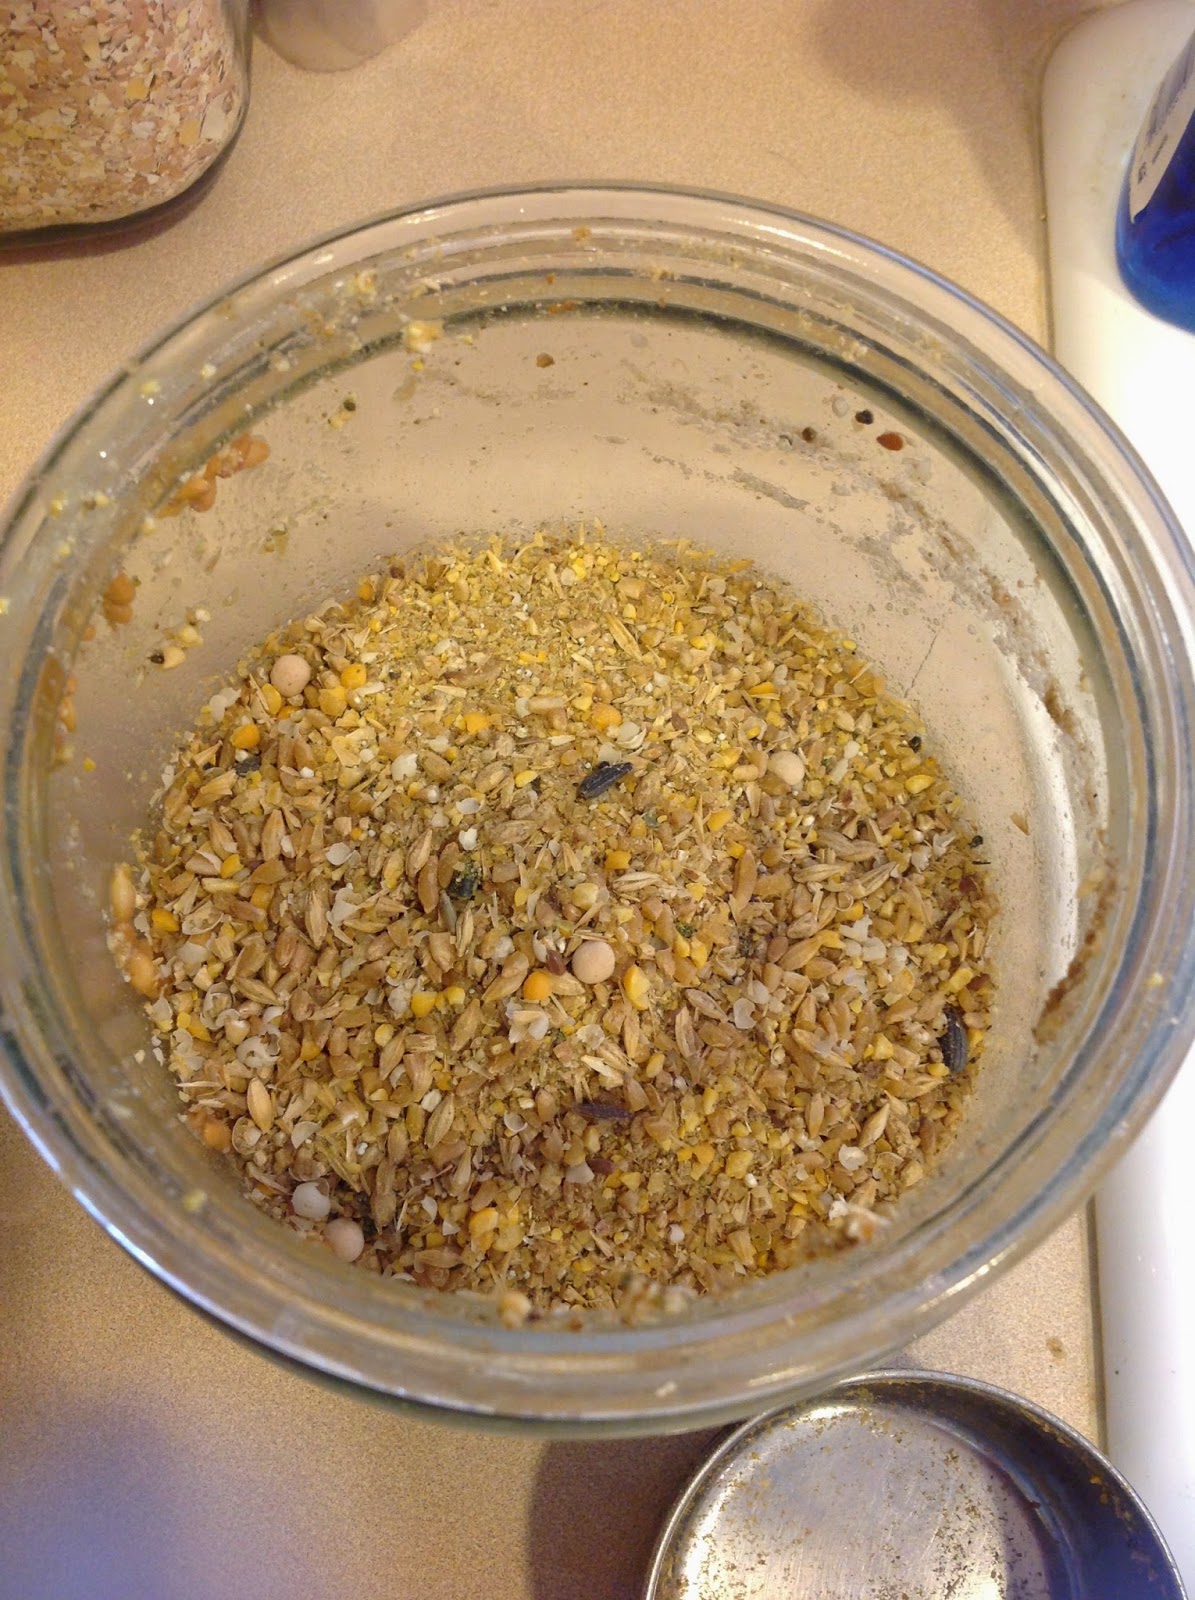
Then I add the measured amount of dry feed needed for the next day.  It's the same quantity of dry feed (4 cups) but it can be a varied mix depending on what the 'girls' needs are.  For example, during molting season I add 1 cup of higher protein food like wheat berries or split peas, and during the cold months I will mix in some scratch corn to warm them up.


I then add about 5-6 cups of water.  Once stirred and allowed to settle, there should be at least 2" of liquid above my dry mix.  This allows space for swelling while still remaining covered by liquid.


I usually give it a gentle stir again in the evening, and add a little water if needed at that time to maintain at least an inch of water above the feed level.  And that's it.  So if I have to be away the next day I just don't mix a new batch for the next day.  When I return home I will start a new batch.  It takes a couple of days for the the true fermenting process to begin again from fresh, but the girls enjoy the wet feed during that time.  Once the fermenting process is going, it stays good by just adding the liquid retained from the batch I am serving, plus the little bits left in the jar when I pour it out each morning.  Since I am reusing the liquid, my mini-scale version is really no different then when you are fermenting in a big jar and keep adding more feed and water to jar each day to keep it going. 

I can also bring my small jar with, and use this mini-scale version when we are traveling with our chickens, so they get fermented feed even when they are away from home.  If you have just a few chickens, don't feel that you need to have a huge operation to provide your chickens with the benefits of fermented feed, try making your own mini-scale version of fermented feed.


Keeper of 1 husband, 3 dogs, 
3 cats, and 17 Chickens!

Follow on Bloglovin

http://www.Facebook.com/backyardchickenlady

Monday, July 8, 2013

Lacto-Fermentation ~ Making My Own Fermented Chicken Feed

As you've probably guessed by now, I love experimenting with new things.  Especially things that benefit our lives or our pets lives.  Recently while researching about the best feed to give your chickens I kept seeing the mention of 'fermenting feed'.  When I hear the word 'fermenting' I think of fermenting to make alcohol, but I quickly learned there are several kinds of fermentation.  The one that I am most interested in was 'Lacto-Fermentation'.

What exactly is 'Lacto-Fermentation'?  The best explanation came from the Natural Chicken Keeping blog, as they explain that "Lacto-Fermentation uses naturally occuring bacteria to partially break down the food, improving its enzyme content and increasing its levels of vitamins B, C, and K.  It also makes food more digestible, and boosts the "usable" protein level by about 12%."  This means that by fermenting your chickens food you are essentially enhancing their food to make it easier for them to digest and increasing the nutritional value of the food.  I've heard from many chicken keepers that the chickens will end up eating less food in the long run, while getting so much more out of the food.

This sounded like an experiment that I definitely wanted to try.   I read the Natural Chicken Keeping blog, as well as many other similar articles about how to properly ferment chicken feed.  The methods all vary just a bit, but follow some of the same basic principles, so I kind of combined all of their basics and created my own variation of chicken feed fermentation.  Here is what I did to make my own fermented chicken feed.

First I needed a container to ferment my feed in.  With this being my first experiment I didn't want to spend any money on supplies until I knew if this would work for me and if my chickens even liked.  So I started with a large clear glass mixing bowl.  You can use glass, lead free ceramic,  or food grade plastic, but do not use metal because the high acid content can interact with metals.  I prefer glass, especially clear glass, so I can watch what's going on in the fermentation process.

My chickens currently eat dry crumbles so I started with that.  You can use what ever dry feed your chickens eat now.  For my test batch I used 2 cups of crumble feed and 1/4 cup of wheat seeds, 1/4 cup of barley, plus a 1/4 cup of scratch.


I mixed these dry ingredients up in the bowl then covered them with about 1' to 1-1/2" of unchlorinated water above the level of the feed.  I have a Reverse Osmosis machine that filters chlorine out of my water but if you use regular tap water, you must assume is has some chlorine added by your water municipality.  To de-chlorinate your water just fill a pitcher of tap water and let it sit out over night.  The chlorine will naturally evaporate.  You do not want to use chlorinated water because it will kill the good bacteria that you want to grow in the fermentation process.


Once I added the water to my dry feed, I stirred it gently to make sure that all parts of the dry feed were wet, then I put a lid over the bowl.  It does not need to be air tight, I just placed a dinner plate over my bowl and it worked fine.   You need to monitor the water level over the first 24 hours because the dry food will swell as it soaks up the water.  If the water level gets too low, just add a little more unchlorinated water.  You should also gently stir the fermenting feed every 2- 3 hours during the first several days, (don't worry about it at night).

By the 2nd full day I began to see bubbles forming on the top of the water.  This is caused by the bacterial giving off carbon dioxide.  It also began to smell kind of sour, which reminded of me of the smell of my fresh sourdough bread dough before it goes in the oven.  It is not stinky and rotten, just kind of sour.  The slightly sour smell and the bubbles are a good sign that things are going well.


Once I reached this stage I wanted to feed some of it to my chickens.  I used a screened ladle to scoop out some feed from the bottom of the bowl and let most of the water drain out before placing it in my serving dish.  Then I took it out to feed to my chickens for the first time.   Now before I tell you about their reaction, let me tell you what they usually act like when I have give them something new.  They stand way back from the dish looking at it with total suspicion mixed with disgust.  After a moment, if no one is brave enough to approach the dish, I will take a small bit and offer it to one of the chickens.  The small amount doesn't seem so scary so they take a bite, then come back for more...then the others will come try it too.  It is usually the second (or even the third) time that I offer them something new before they all eagerly eat it, so I didn't expect anything different this time.


However...as soon as I sat the dish of fermented feed on the ground they all gathered around and began eating it like crazy!  I don't know if they smelled it and liked the smell, or it was the colorful variety that was just too appetizing to them or what, but I was thrilled that they liked it so much.  They ate every last little morsel of food in the dish within just a few moments.  So now I knew they liked it, and that my next serving needed to be bigger.


I fed it to them again that evening at around 6:30 pm.  That's when they seem to eat the most food and get their craws really full for the night, so I wanted them to go to bed with fermented feed tonight which would be easier for them to digest.  When I served their evening helping of fermented food they once again ate it up right away, and they didn't leave much in the dish this time so now I knew how much was the right amount to satisfy them.

Since they loved it so much and it was so easy to make, I bought a 2 gallon glass jar with a heavy lid and started a whole new -much bigger- batch.  This time I added some barley and a little wild bird seed treat (seeds, millet, fruits, etc) to the mix as well.  The sunflower seeds floated to the top (you don't want any of the food above water) so I scooped them out with a screened ladle.  I added the first batch to this second batch, which helped to give the 2nd batch a kick-start.  It was bubbling by the next morning.  This is an important reason why you don't throw out your old water when you start a new batch. (unless the first batch went bad, in that case start all over again)  What I do is keep a bowl of the dry mix next to the fermenting jar.  As I scoop out wet food, I pour in replacement dry food.  Remember that the dry food swells when it soaks up the water, so monitor the water level at all times so it is always at least 1" over the level of the feed.


After feeding fermented food to my chickens for several days I noticed that they seemed perkier.  I think this feed must be making them feel better.  I bet they are also staying a little better hydrated in this AZ heat because they are getting such a high water content in their food.  And I don't know if its my imagination, but after just two weeks of fermented feeding, their feathers look shinny and more full of color.


There are two drawbacks to feeding my chickens fermented feed.

1. When we were evacuated for the fire, I didn't bring the huge fermenation jar with us.  So I only had dry crumble feed to give them.  When I offered it to them they acted like I gave them chalk to eat.  Barry (my cockerel) showed his distaste by standing in the feed dish and kicking the dry feed out onto the ground.  It looked like he was trying to dig down to find the good stuff.  I had to wet their food to get them to willingly eat it.

2. They loved fermented feed so much, and quickly got use to me bringing them a dish in the morning and evening.  So by the third day, just after sunrise (and each morning since) Big Red gets up on the feed can by my bedroom window and pecks on my window while she squawks loudly.  I imagine she was saying, "Uh Mom, are you still sleeping? We are up and ready for breakfast!"

"Uh Mom, are you still sleeping? We are up and ready for breakfast!"

I am glad they like it so much, and I really don't mind the early morning wake up call.  It is kind of sweet to roll over and see her peeking in my window.  So now I keep a big jar of fermenting feed on my counter by my sink.  It sits there next to my stacks of sprouting seeds that they love to have for a fresh treat.  It may not look to pretty sitting there between my kitchen and living room, but it does make an interesting topic for discussion when company comes.

If you would like to try fermenting feed for your chickens, I recommend that you visit the Natural Chicken Keeping blog and read their 3-part series on the Benefits of Lacto-Fermention (how it benefits your chickens),  Fermentation Basics (the science behind fermenting) , and the complete How-To fermenting instructions.  After reading about fermenting feed from multiple sources I found theirs to be the best.  Be sure to read the comments after each article because they have addressed updated information in the comments as well.

Keeper of 1 husband, 2 grandkids, 3 dogs,
3 cats, and 17 Chickens!
 
Follow on Bloglovin


Did this post stir something inside of you? If so, Please leave me a comment, I would love to know what you're thinking!!!

Friday, June 21, 2013

Fruit and Veggie Freezer Cake Treats for your Chickens

When I can make a healthy snack for my chickens, I feel good about that.  When I can clean out my freezer and get rid of all of those last little bits of veggies and fruit left over in a multitude of nearly empty bags, or toss the ones that are all frostbitten (and therefore not edible by me), I food good about that too.  But when I can combine those two things, I feel really good!

Yesterday I did just that.  I read a post at Homgrown on the Hill where Mary was making 'Confetti Treat Ice Wreath' based on a recipe that she got from Kathy at Fresh Eggs Daily.  Basically you use a bundt cake pan to make frozen fruit and veggie treats for your chickens to eat on hot days.  It helps to keep them cool plus it's nutritious too.  Kathy suggested that you go through your freezer looking for those little bits of frozen veggies and fruits left over, and if you don't have enough now, start collecting little bits of veggie left overs in a bag or bowl in the freezer until you do have enough to make this frozen treat. 

I love this idea!  Who doesn't have something left over in the freezer that really should be tossed.  Or the last spoonful of veggies left over after dinner -not enough to put away, but too much to just throw away (not that we would do that since we have chickens who love leftovers), but you get the idea.

I used this idea as the motivation to clean out my fridge and freezer yesterday.  I had a surprisingly lot of fruits and veggies tucked away here and there.  I had one bag of California Veggie Mix (cauliflower, carrots, and broccoli) that I never even opened.  It was an off brand so I didn't recognize the bag and apparently ignored it for a long while.  The contents were a bit frosty, but perfectly fine for the chickens to nibble on.

So I tossed all of this into a big bowl and let it thaw out enough that I could mix it up.  I could have put it into a large bundt cake pan as Kathy and Mary did, but my chickens are young and just learning about fresh foods, so they tend to be afraid of whatever I give them the first time or two, then they look forward to it by about the third time I offer it, so I didn't want to waste a big block of frozen goodies.  Instead I used my Giant Muffin Pan with 6 giant cups that will hold about two cups each.  Then I added a little water to bring the level up just below the tops.  And I popped this into the freezer overnight.


Here's one of my frozen cakes ready to be served.  It looks good enough to eat myself...well almost.


I tossed the remaining 5 frozen cakes in to a one gallon Ziploc to be served up later in the week.


I can offer one (or more as needed) on hot days to help the chickens stay cool, while dinning on healthy treats.  Just place the frozen treat (no matter which size you decide to make) onto a dish and place it in the shade where the chickens can enjoy it longer.

My mix included broccoli, cauliflower, carrots, bananas, cooked potatoes, apricots, peaches, celery, and diced apples.  Who knows what my next batch will have, that's the beauty of this treat...its whatever you have in your fridge.

Now lets see what the chickens think of it... Big Red and Barry are always the first to check out any new treats I bring.  Big Red quickly discovered that if she pecks at the colorful spots on the side she gets a cool, tasty tidbit.

Big Red and Barry checking out the new Frozen Treat.
Once Big Red and Barry have given it a few pecks everyone else comes to check out this strange new treat.  There was a little bit of bickering after everyone got in a few pecks at the treat.  Then Big Red ran everyone off (as usual) so she and Barry could have it all to themselves.  But the others are pretty quick so they kept coming back and pecking on the sides (using Barry as a shield between themselves and Big Red).   Big Red finally took a break and the others went to town on it.  I think she got a brain-freeze from eating it so fast.  I would say it was a hit.  They ate most of it before it even had a chance to thaw, so tomorrow I'll bring out two of them.


Do you have some old fruits and veggies in your freezer or refrigerator that you could use to make a Freezer Cake for your chickens?  Go take a look, I was surprised by how much I was able to come up with...and it made so much more room in my freezer too!

Check out the Cool Treat Christine at "A Fly on Our (Chicken Coop) Wall" created.  Thanks for sharing this post Christine, you are a sweetie! 


Keeper of 1 husband, 2 grandkids, 3 dogs,
3 cats, and 17 Chickens!
 
Follow on Bloglovin


Did this post stir something inside of you? If so, Please leave me a comment, I would love to know what you're thinking!!!

Thursday, June 13, 2013

Experimenting with Growing Chicken Fodder in a Jar

I feel like a mad scientist with all of the experimental seed sprouts I've been growing lately.  I'm in search of the best fodder, that grows fast, grows big, the chickens love it so much they are waiting at the door when they see me coming towards them with sprouts.  I want to learn what grows best by the easiest method possible in my climate.  That sounds like a lot of requirements but I bet I can meet most of them if I just keep working at it.

I told you about my experiments with wild rice and wild bird feed in baskets.  The reason I chose those to items is because that is what I already had available in my pantry.  I didn't have success with the wild rice but the wild bird seed was a bit more promising, however I think bird seed just grows better in the dirt.  That's why I planted a mixture of wild bird seed and pasture grass in the grazing frame I built inside the chicken run.

I wanted to try growing wheat, but I couldn't find any locally and we live so far outside the city that I wasn't interested in the 1-1/2 hour to 2 hour drive to town to try and find it.  Nor did I need a 50 lb bag for experimenting.  Until I know that I can successfully grow anything I am only testing small amounts.  So I decided to order a 5 lb bag of organic, non-GMO Hard Red Wheat from Amazon.  Yes, I know I could have bought a 50 lb bag for only a few bucks more (or a little over double the price of the small bag if you add gas to get to town and back), but like I said, I don't want 45 lbs laying around if my experiments are not successful.

So my bag of wheat was delivered today...gotta love Amazon Prime Free 2-day shipping!  I was anxious to give wheat a try because from what I have read lately, wheat seems to be the most popular fodder, and just might meet all of my requirements.  The tough part will be the method.  I have been using the baskets but I just learned about another method that sounded fun too where you grow your seeds in a glass jar.  So I thought I would try this method first, then test it in a basket and compare the two.

As typical, I cannot remember where I first read about this.  I swear I cannot remember anything these days.  (Menopause is such a wonderful stage in every woman's life...Not!)  Anyway, if I remember where it was later, I will update this post.  But basically you soak the seeds in a glass jar overnight, then you rinse them out twice a day.  I think I can handle that.  So when my wheat seeds arrived I already had my big jar ready.  Some folks use quart-sized mason jars, but I like this big jar, so for my experimentation phase I am using it instead.

I poured in 1 cup of wheat then filled the jar with water.  I swished it around to thoroughly wet all of the seeds.  To make it easy to drain and rinse the seeds without losing them by accident, I put a double layer of cheese cloth on the top and tied it on with gift ribbon.  I didn't have a rubber band that big (which would have worked nicely), nor did I have my twine handy (because I was using it out in the garden earlier and forgot to bring it in).  Besides, the gift ribbon made it look kind of pretty don't you think?

Soaking Wheat Seeds. *Note the lid is not tightened, just sitting on top.


The next day I rinsed the seeds and left the jar laying in such a way that any excess water ran out the cheese cloth covered top.  Letting seeds sit in standing water will aide in creating mold...you don't want mold in your sprouts.   Note that I did not add bleach to my soaking water.  Some people have suggested doing that to prevent mold, stating that it will all be rinsed away by the time the fodder is big enough to give to your chickens.  My thought is that if I am using organic, non-GMO wheat...why would I add a chemical like bleach in the first stage (or any stage) of this process?  The key to preventing mold will be to not allow standing water.

The rinse process is simple.  Each morning and evening I just fill the jar with water (right through the cheese cloth covered on top), gently swish it around and pour the water out, then I rinse it one more time, and drain the water out again.  Then I place the jar at the 45 degree angle to allow any extra water to drain out of the jar.  

In this drawing, the angle from line A to B is 45 degrees
You may need to use some props to get your jar to stay at the 45 degree angle.  I use a large serving bowl and a shoe box next to it and it works just fine.  If I am pleased with this growing method and decide to go into serious production mode, I will design a simple stand for my jars that will hold however many jars I need to make a complete cycle of crops.  So if it takes 7 days for these sprouts to reach the stage that I would feed them to my chickens, then I will use 7 jars, then when one is fed to the chickens I will clean it out and start a new batch.  So if/when I get to that stage I will share my stand design with you so you can build one too if you like.

Here we are at the beginning of Day 1 (after the initial soak):
 

Here is a picture in the morning on Day 2.  See the tiny little light-colored sprouts beginning to grow out the end of the seeds?


Here is a picture from the morning on Day 3, right after the first rinsing. You can really see the little sprouts now.

And Day 3 in the evening...see the growth?


Oh my, look at these sprouts on the morning of Day 4!  To give you some perspective on the growth, the soaked seeds took up no more than 1/4th of the total space in the jar, and now the sprouted seed that are all entangled together take up about 2/3 of the jar!


And look at a close up of the sprouts.  They have been just the long white colored root-like stems and now I am beginning to see shorter, stouter greenish stalk-like stems. Hmmm this is so interesting!

I bet the chickens would love to have some of these sprouts right now for a fresh cool treat...but I am going to let them go another day or two, to see what will come of these new stalks developing.  Can't wait to try sprouting these in baskets too.

Day 4 PM, nearly full:
Day 4 PM nearly full jar.


Day 5 (My camera ate the picture of the full jar this morning) The Wheat sprouts have grown so much and the new green stalks are about 1/2" long now.  They have completely filled my big jar and were protruding out the cheese cloth end, so it was time to take them out even if this is earlier then I wanted.  I feel they could have grown a little fatter stalks if they had another day or two.   

Day 5 Sprout, stalk about 1/2" long.


I had to really work to pull half of the bundle of sprouts out of the jar, thank goodness I used a wide mouth jar!  Once out, I ran water over them while I gently de-tangled the mass of sprouts.  I placed them on a glass dish and served them up to the chickens.  They didn't know what to do with them.  I think they might have even been a little afraid of them too. Haha!  So I broke off a few little sprouts and offered them to the chicks.  They ate them when I offered them sprouts one-by-one.  Even chased each other around when they had a piece hanging out of their mouths.  It was really funny.  I would have recorded it by I didn't have my camera handy.

Day 5 Wheat Sprouts served up to my chickens.

I broke up the remaining half of the sprouts into two baskets to see if I could get them to continue to grow...I don't have much hope of that because they did not start in the baskets.  But one thing I did learn is that wheat sprouts and grows nicely.  I think I will add some to my grazing frame and see how well it does there.

So to summarize what I learned from this experiment...

1.) Wheat Seeds germinate easily.

2.) Don't put too many seed in the jar.  I used less than 1/4 of the jar in seeds but the sprouts quickly grew too big for the jar.  I would have liked to allow the sprouts to get a little bigger but the chickens enjoyed them just the same.

3.) Comparing how quickly my other seeds dried out in the baskets, it seems that the jar holds more moisture around the seeds without them standing in water.  The jar is practically upside down all the time so the water runs right out the bottom through the cheese cloth, but the glass holds the moist air...which seems to help them not dry out.

4.) When I want to quickly grow sprouts for my chickens, this is the method I will use.


Keeper of 1 husband, 2 grandkids, 3 dogs,
3 cats, and 17 Chickens!
 
Follow on Bloglovin


Did this post stir something inside of you? If so, Please leave me a comment, I would love to know what you're thinking!!!
****
I am so honored that this post has been featured in the "HomeAcre Hop" on Thursday, June 20th!   Thank you ladies!!!

Everything Home with Carol
Link will be live on Thursday, June 20th.