Showing posts with label Backyard Chickens. Show all posts

Friday, August 22, 2014

My Mini-Scale version of Fermenting Chicken Feed

Last year I shared with you how to make your own fermented chicken feed, and I have continued to feed my 'girls' fermented feed, but it can be difficult, if not impossible, to keep the fermented feed from spoiling with our erratic work schedule.  We are self-employed in the property rental business so we don't keep regular hours.  If we have a tenant move out then we may have to spend several days away from home to prep the house or commercial building for a new tenant, or if something breaks we may have to make an unscheduled trip to that location to fix the problem.  Which has resulted in my fermenting going bad a time or two because I was not home to tend to it.  And Boy is that Stinky!

The only alternative is to feed them the full amount that is currently in the jar before we leave, which could be several days worth.  It wont go to waste because they will just eat it and not their dry feed in these instances, but it just seems wasteful to me.  When we are away (and aren't taking the chickens with us) we have a friend chicken-sit for us, but I cannot expect her to monitor my fermented feed for me...you develop a feel for how to maintain it, so it's just too much to ask someone unfamiliar with it to step in and do it.

Over time I have learned exactly how much feed it takes each day to feed my 17 hens (fermented feed is about half of their primary food, they also have dry feed available), so now I ferment my feed on a scaled down basis, meaning I only have on hand what will be needed for one day.  This 'mini-scale' version works very well for us, and it would work for those of you who don't have a large flock and don't want to have a full-scale fermenting operation in your kitchen.

So instead of my previous set up where I used a huge 3-1/2 gallon jar on my counter (or the two bucket system I occasionally used outdoors during cool months) that I added more feed and water to each day after I scooped out their morning meal, now I just keep a 2 gallon jar by my kitchen sink.


Each morning I reserve most of the liquid from the fermented jar when dumping the contents of fermented feed into my draining tray.


Then I pour the fermented liquid back into the jar with what ever little bits that remained in the jar after pouring it out.  I don't wash it out, because what ever is left in the jar, along with the reserved liquid, and this jump-starts the fermenting process for the new day.


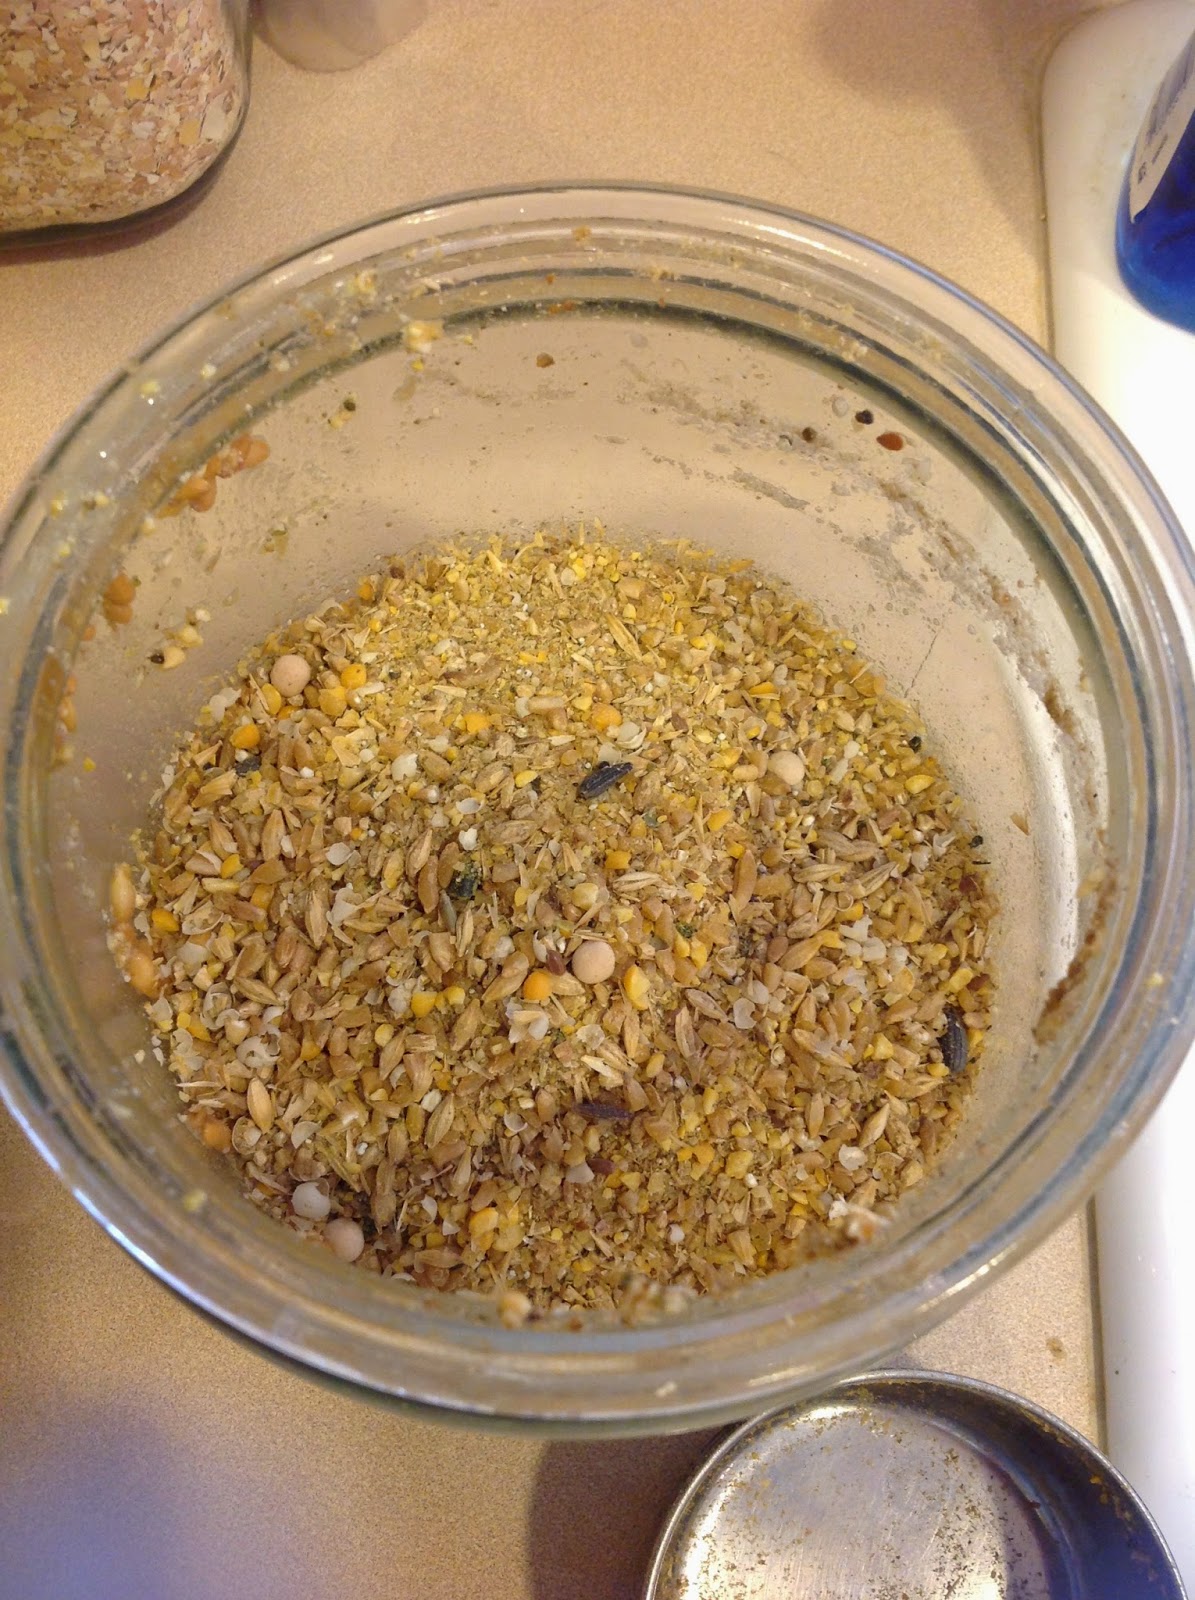
Then I add the measured amount of dry feed needed for the next day.  It's the same quantity of dry feed (4 cups) but it can be a varied mix depending on what the 'girls' needs are.  For example, during molting season I add 1 cup of higher protein food like wheat berries or split peas, and during the cold months I will mix in some scratch corn to warm them up.


I then add about 5-6 cups of water.  Once stirred and allowed to settle, there should be at least 2" of liquid above my dry mix.  This allows space for swelling while still remaining covered by liquid.


I usually give it a gentle stir again in the evening, and add a little water if needed at that time to maintain at least an inch of water above the feed level.  And that's it.  So if I have to be away the next day I just don't mix a new batch for the next day.  When I return home I will start a new batch.  It takes a couple of days for the the true fermenting process to begin again from fresh, but the girls enjoy the wet feed during that time.  Once the fermenting process is going, it stays good by just adding the liquid retained from the batch I am serving, plus the little bits left in the jar when I pour it out each morning.  Since I am reusing the liquid, my mini-scale version is really no different then when you are fermenting in a big jar and keep adding more feed and water to jar each day to keep it going. 

I can also bring my small jar with, and use this mini-scale version when we are traveling with our chickens, so they get fermented feed even when they are away from home.  If you have just a few chickens, don't feel that you need to have a huge operation to provide your chickens with the benefits of fermented feed, try making your own mini-scale version of fermented feed.


Keeper of 1 husband, 3 dogs, 
3 cats, and 17 Chickens!

Follow on Bloglovin

http://www.Facebook.com/backyardchickenlady

Saturday, August 9, 2014

What are Your Thoughts on 'No Crow Rooster Collars?

I don't have a rooster at this time, partly because my boy Barry was getting too aggressive with me.  He might have been less aggressive with me if I had hatched him out myself.  Perhaps then we would have bonded.  But I got him and seven other babies when they were just 3 weeks old.  I don't think they were handled much before us.


However, the noise was the biggest factor for us.  We live in a rural area so roosters are allowed, and I do love the sound of a rooster crowing, just not at my bedroom window at 4:00 am!  We thought he was a she until he started developing a much bigger comb then his sister.  Then one morning I heard the craziest noise coming from the coop.  It sort of sounded like a mix between a prepubescent human boy trying to crow like a rooster, and a chicken with his nuts caught in a trap.  Okay, I know they don't have nuts hanging, but the sound wasn't pleasant either way.   It was kind of funny to hear -once I knew what he was trying to do.  It took him quite some time to perfect his crow.  He was successfully mating with my older hen and fertilizing her eggs long before he got that crowing thing down.

Then it became a problem.  He would crow just before the sun came up, then right after it came up, then when he was trying to woo the girls in hopes of mating, then after each mating session, then...you get the idea.  We would be awakened by his crowing at 4:00am and hear him crow at least another 20 times before 6:30 am, which is when we gave up all hope of sleeping through it and just got out of bed.

Unfortunately Barry had to go.


Today while I was reading the current issue of Backyard Poultry Magazine I discovered a product that might have helped us.  It's called the 'No Crow Rooster Collar'.  Have you heard about this product?  I am not sure how long they have been around but I think it is a neat idea.  The theory behind this product is that you prevent the rooster from crowing by reducing the amount of air he can build up in his throat to make the crowing sound.  This collar doesn't obstruct his normal breathing airway, or inhibit him from eating or drinking normally, it only prevents the throat from expanding to hold a pocket of air needed to make the crow sound.

I found this video on YouTube showing how it works.  The rooster's crow sounds kind of like a tracheotomy cough, but it's much quieter than a normal crow sound I guess.  Also, as you will see in the video, it does NOT inhibit him from performing his masculine duties!  The guy who made this video, made his own collar using an extra wide Velcro strip.  The official 'No Crow Rooster Collar' is prettier and they have already worked out the fitment issues, (and actual users tell me there is a big difference) but if you didn't want to spend the $14 for a official one from the NCRC company, you could try to make your own I guess. 

[Author's note: I don't mean to sound insensitive to people who have a tracheotomy, it is just that I have worked in the nursing field, so when I heard the crow in these videos, that is the sound that it reminded me of.  Also, I have been informed by one of my readers who uses the official No Crow Collar that the sound is actually a muted crow sound.]  


Here's another video of a different rooster wearing the official 'No Crow Rooster Collar'. 


Do you have roosters? Is their crowing a problem at your house? Have you tried this collar or some other device or method to stop crowing, or at least quiet the crowing noise?  I would love to hear you thoughts. Maybe once we get the new coop built away from our bedroom I might get another rooster.  I haven't decided about that yet, but knowing that such a product is available if the noise became a problem, kind of makes the thought of another rooster to fertilize my eggs a little tempting.


*This was an unpaid, unsolicited post merely 'mentioning' a product that I have not tried, I am just curious what my readers thoughts are about this or similar products .  There are no affiliate links in this post.  Please see my Full Disclosure here.


Keeper of 1 husband, 2 grandkids, 3 dogs,
3 cats, and 17 Chickens!
 
Follow on Bloglovin


Did this post stir something inside of you? If so, Please leave me a comment, I would love to know what you're thinking!!!

This post shared in the Clever Chicks Blog Hop.

Tuesday, August 5, 2014

Chicken Gym ~ Cabbage Jump (Video)


You know how 5 minutes after summer break begins, the kids start complaining how they are 'So Bored!', well my chickens are no different then kids.  When we were on vacation in Colorado earlier this year the 'girls' were so excited the first day about chasing down all the new bugs that had moved into their run since our last visit.  The next day they lavished on all the weeds that grew up in their area with the help of all the chicken poop they left behind last time. But by the third day the bugs were either eaten up or smart enough to stay outside the fenced area and the grass had been devoured and the roots scratched up.  The chickens looked So Bored.  They had already put that fresh earth to use dust bathing all morning, then by late afternoon they were just laying around in the shade doing nothing.

I knew that if I didn't do something to entertain them they would get so bored over the remaining 11 days of our vacation that they would start bickering with each other.  So I tried to think of some way to get them busy, but I didn't want to have to be actively doing the entertaining myself...it was my vacation too ya know.  

I came up with this...a Chicken Gym!  Check out the 'girls' doing the Cabbage Dance in my video.  I swear I got more entertainment then they did...


[If the video is blurry you can click on the settings icon and adjust it to a higher resolution.]

Is that the just funniest thing?  I changed the music because the wind was blowing and it sounded horrible on the video, I kind of like the music, it is called 'Chicken Dance', very appropriate I think.  I loved watching their little legs flare out to the sides as they jumped up to the cabbage. This was so much fun for me!

What do you do to entertain your chickens?  Or is that entertain yourself with your chickens?


The 'girls' got hours of exercise, they enjoyed the 'treats of their labor', and I was just laughing my butt off.  And, we did it all for just the cost of a .69 cent head of cabbage.  I already had the jute twine laying around.

Here are the Easy Peasy instructions to make your own Chicken Gym:


You need:

A vegetable or fruit that wont immediately fall apart.  I found that cabbage is best but you can use a head of lettuce as well, or a large cucumber, zucchini, apples that are cored, use your imagination.

Twine 

1/2" Paddle Drill Bit (really, any drill bit long enough to go through at least half the width of the veggie will work.

This is what you do:

Drill all the way through the thickest part of the veggie. If your drill bit is not long enough you can drill halfway through, then turn over and drill the opposite side until the two holes meet in the middle.

Poke the twine through the veggie (I doubled mine for more strength since the cabbage was pretty heavy.

Tie the ends of the twine above where the chickens will be 'working out'.  At home they have an arbor top in their run so I tie to that, on vacation we just had chain link fence panels and no top so I first tied a string across the top of two panels then tied the cabbage string to that horizontal string.

Important...you want to adjust the height of the cabbage so that it is just above the reach of the tallest chicken, this way they have to actually jump to peck a piece of it off.  You may want to start with it right at the end of their reach to get them started, then raise it a few more inches after they know what to do.  Mine now always know what to do so I keep it higher right from the start.

 No go build a Gym for Your Chickens!


Keeper of 1 husband, 2 grandkids, 3 dogs,
3 cats, and 17 Chickens!

 
Follow on Bloglovin


Did this post stir something inside of you? If so, Please leave me a comment, I would love to know what you're thinking!!!

This post was included in the Simple Saturdays Blog Hop

Saturday, July 6, 2013

Happy to be home...Chick Photos

I hope you are having a wonderful weekend.  The stress from being evacuated all week is starting to dissipate now that we are back in our home.  So for today I thought I would just share some pictures I took of the chicks after getting back in their home Thursday night.

Barry enjoying the tall grasses in the grazing frame.
Big Red posing for a shot...
Big Red: "What the heck is stuck between my toes?"

Tiny sure missed her Chicken Fountain while we were in evacuation.

Buffy: "I know I saw something move down there, now where is it?"

Everyone else was either camera shy or moving to fast to get a clear shot.  So nothing much happening around our coop, how about yours?

Keeper of 1 husband, 2 grandkids, 3 dogs,
3 cats, and 17 Chickens!
 
Follow on Bloglovin


Did this post stir something inside of you? If so, Please leave me a comment, I would love to know what you're thinking!!!

Wednesday, June 26, 2013

I've been keeping a secret, but now I can share...

I've been keeping this under my hat so to speak, but now I can share it with you!

When I decided to start raising chickens again, the first thing I did was call the county planning & zoning department, because unlike decades ago when I had chickens before, there are now zoning laws in many places that prohibit raising livestock and specifically poultry.  I learned that on our 1 acre rural property I was only allowed to have 8 adult hens and NO roosters.  However there are other chicken keepers in our community with way more than 8 hens, and I hear the lovely sound of roosters crowing each morning so I know there are either outlaw chicken keepers or different rules for different folks around here...so I asked about this.  The zoning department person said that in our particular community, which is surrounded by livestock (mostly cattle) and hay fields, we have restrictions on the number of hens for lots that are under 1.6 acres (ours is 1.02).  So out of curiosity I asked, "If we owned the vacant lot next door that is over an acre, combined with ours it would be 2.32 acres, what would our poultry limit be?"  She looked up the property next door to verify the size and told me that if we owned both pieces of property then I would not have a limit on the number of hens, and I could have roosters too!

We were okay with only having 8 hens, and joked that if we wanted a rooster we would have to buy the property next door, making that one really expensive rooster!  But the idea of buying the property next door was not a new one.  We had considered it when we first bought our property because we wanted extra space.  However the people who owned that property wanted way too much for it, so we didn't give it any serious thought.

Then a few weeks ago the hubby was trying to figure out where he could build a new shop on our property.  We do have an acre, but part of it is up a hill so you can't really build there.  The long winding driveway getting up to our house takes up lots of space in the front of our property, leaving very little room for a shop.  We were discussing the placement one day when I suggested that we rethink the property next door.  If we could get it at a reasonable price perhaps we could build the shop on that section...and I could have roosters, and maybe a big garden next year, or more critters!  "Whoa!" my hubby said, "remember they wanted way more than it was worth last year?  I'm sure they haven't come down that much in a year."

The property next door.  It will need lots of clearing work to make it useable.


Well I went that moment and looked up their MLS listing.  It was still for sale and they had dropped the price just recently...by nearly half!  Now it was within range of us being able to buy it.  I did a little deeper searching and learned that the couple who owned it were now divorced, and not amicably so, plus the Mr, had a huge tax lien recently filed against his business a few months ago, so they might now be ready to negotiate on the price for a quick sale.  So we made an offer.

It was..........ACCEPTED!!!!  The property is now in escrow and should be closing very, very soon!  So my little Barry the Barred Rock Rooster can legally stay!  Hubby can build his shop, I can start my first compost pile, and maybe, just maybe, I can get some pygmy or dwarf goats in the coming year.  I have wanted to raise them for a very long time for their milk to make my own goat cheese...and because they are so darn Cute!

I want a couple of these! (Source)


I've wanted to share this news with you for a few weeks now, but didn't want to jinks things.  But now all of the escrow hurdles have been jumped and we are running for the finish line! Hooray!!


Keeper of 1 husband, 2 grandkids, 3 dogs,
3 cats, and 17 Chickens!
 
Follow on Bloglovin


Did this post stir something inside of you? If so, Please leave me a comment, I would love to know what you're thinking!!!

Sunday, June 23, 2013

Lazy Sunday afternoons with the Grandkids and Chickens!

I love lazy Sunday afternoons...

The grandkids are visiting us this weekend, and we're having such a great time hanging with the chickens, visiting a friends animals, and spending some quiet time at the public library.  Later today we are planning a Jeep drive to explore the mountains, and have a picnic.

The grandkids usually spend at least two weekends a month with us, but the last three weekends they have been at their dads for an extended summer break visit.  The kids were shocked at how much the chickens have grown in that time.  They got to meet our newest edition, Big Red, who we got right after their last visit.  They were so excited when I tol them that Big Red lays an egg almost every day.  She has been sweet enough to lay an egg daily while the kids have been visiting.  Collecting the daily egg has been so much fun for the kids.  Little Miss did the actual collecting of the egg because she is tall enough to reach in to the nesting box, but she let Little Man hold it too.  He asked if the egg was real, haha.  They have only see eggs that come out of a carton purchased at the store, so this was a special thrill for them.

I think that Little Miss must be a 'Chicken Whisperer' because the chicks just flock to her when she comes in the run.  She seems to have instantly bonded with them and even the chicks that never let me even touch them have walked right up to her and allowed her to pick them up.  Little Man wasn't interested much in the chickens, but hey, what do you expect of a 4 year old boy when there's an electric quad all charged up and a big yard to ride around in.

Well, I have to go, they are about done drawing their books that I need to help them staple together as a gift for mom.  Enjoy some of the pictures of fun things we have done this weekend so far.

Little Miss showing off the first egg she collected.

Little Miss eating scrambled eggs from Big Red.  She loved them!


Petting the 17 week old Pygmy Goats (not ours, but maybe soon!!!)


Little Man checking out the Donkey...a little apprehensive.

Little Miss instantly bonds with any animal (or insect).
Little man...I put this straw hat on his head and he instantly broke out in a cowboy song & dance.
Some quiet computer time at the library.


What are you doing on this wonderful weekend around your place?


Keeper of 1 husband, 2 grandkids, 3 dogs,
3 cats, and 17 Chickens!
 
Follow on Bloglovin


Did this post stir something inside of you? If so, Please leave me a comment, I would love to know what you're thinking!!!

Friday, June 21, 2013

Fruit and Veggie Freezer Cake Treats for your Chickens

When I can make a healthy snack for my chickens, I feel good about that.  When I can clean out my freezer and get rid of all of those last little bits of veggies and fruit left over in a multitude of nearly empty bags, or toss the ones that are all frostbitten (and therefore not edible by me), I food good about that too.  But when I can combine those two things, I feel really good!

Yesterday I did just that.  I read a post at Homgrown on the Hill where Mary was making 'Confetti Treat Ice Wreath' based on a recipe that she got from Kathy at Fresh Eggs Daily.  Basically you use a bundt cake pan to make frozen fruit and veggie treats for your chickens to eat on hot days.  It helps to keep them cool plus it's nutritious too.  Kathy suggested that you go through your freezer looking for those little bits of frozen veggies and fruits left over, and if you don't have enough now, start collecting little bits of veggie left overs in a bag or bowl in the freezer until you do have enough to make this frozen treat. 

I love this idea!  Who doesn't have something left over in the freezer that really should be tossed.  Or the last spoonful of veggies left over after dinner -not enough to put away, but too much to just throw away (not that we would do that since we have chickens who love leftovers), but you get the idea.

I used this idea as the motivation to clean out my fridge and freezer yesterday.  I had a surprisingly lot of fruits and veggies tucked away here and there.  I had one bag of California Veggie Mix (cauliflower, carrots, and broccoli) that I never even opened.  It was an off brand so I didn't recognize the bag and apparently ignored it for a long while.  The contents were a bit frosty, but perfectly fine for the chickens to nibble on.

So I tossed all of this into a big bowl and let it thaw out enough that I could mix it up.  I could have put it into a large bundt cake pan as Kathy and Mary did, but my chickens are young and just learning about fresh foods, so they tend to be afraid of whatever I give them the first time or two, then they look forward to it by about the third time I offer it, so I didn't want to waste a big block of frozen goodies.  Instead I used my Giant Muffin Pan with 6 giant cups that will hold about two cups each.  Then I added a little water to bring the level up just below the tops.  And I popped this into the freezer overnight.


Here's one of my frozen cakes ready to be served.  It looks good enough to eat myself...well almost.


I tossed the remaining 5 frozen cakes in to a one gallon Ziploc to be served up later in the week.


I can offer one (or more as needed) on hot days to help the chickens stay cool, while dinning on healthy treats.  Just place the frozen treat (no matter which size you decide to make) onto a dish and place it in the shade where the chickens can enjoy it longer.

My mix included broccoli, cauliflower, carrots, bananas, cooked potatoes, apricots, peaches, celery, and diced apples.  Who knows what my next batch will have, that's the beauty of this treat...its whatever you have in your fridge.

Now lets see what the chickens think of it... Big Red and Barry are always the first to check out any new treats I bring.  Big Red quickly discovered that if she pecks at the colorful spots on the side she gets a cool, tasty tidbit.

Big Red and Barry checking out the new Frozen Treat.
Once Big Red and Barry have given it a few pecks everyone else comes to check out this strange new treat.  There was a little bit of bickering after everyone got in a few pecks at the treat.  Then Big Red ran everyone off (as usual) so she and Barry could have it all to themselves.  But the others are pretty quick so they kept coming back and pecking on the sides (using Barry as a shield between themselves and Big Red).   Big Red finally took a break and the others went to town on it.  I think she got a brain-freeze from eating it so fast.  I would say it was a hit.  They ate most of it before it even had a chance to thaw, so tomorrow I'll bring out two of them.


Do you have some old fruits and veggies in your freezer or refrigerator that you could use to make a Freezer Cake for your chickens?  Go take a look, I was surprised by how much I was able to come up with...and it made so much more room in my freezer too!

Check out the Cool Treat Christine at "A Fly on Our (Chicken Coop) Wall" created.  Thanks for sharing this post Christine, you are a sweetie! 


Keeper of 1 husband, 2 grandkids, 3 dogs,
3 cats, and 17 Chickens!
 
Follow on Bloglovin


Did this post stir something inside of you? If so, Please leave me a comment, I would love to know what you're thinking!!!

Monday, June 17, 2013

Does it make me a Crazy Chicken Lady if...

Okay, I think I am officially Chicken Obsessed!  This week we were having some really HOT days.  And although I have done a lot to cool down the chicken run for my chicks, I was still having a problem keeping the inside of the coop cool enough.  This would not normally be an issue since the little chickens don't usually go inside during the day.  But I do have one layer, Big Red, who seems to go inside to lay an egg when it is at the hottest times of the day.  She is probably baking her brains in there, sitting in that nest box when it is easily 100 degrees inside, even with the fan circulating the air.  Her egg production has had a few issues this week and I think some of it is because of the heat in the coop when she goes inside to lay.

So while I was hanging out inside my air conditioned house, trying to figure out how I could possibly cool it down for her, I got an idea...


Yes, that is an A/C unit sticking out of my chicken coop window.  Crazy, I know, to install A/C for your chickens, but hey, they are my pets as well as my egg producers.  Wouldn't you provide the very best for your pets?  Well, I would.  I just happened to have a $150.00 gift card I got for signing up for DirectTv service recently, so I took the card and went shopping at Home Depot for an inexpensive, small room A/C window unit.  I found this one for $119.


It's has an energy saver rating and is suppose to only use approximately $42 of electricity per year.  Since my goal is to keep the coop in the 80's and not as low as I have it inside my house, I figured it wouldn't use too much electricity.


So Early on Father's day the hubby and I installed this unit in the window of our coop.  As you can see from my thermostat inside the coop, it was already 91 degrees at 8:35 am!


With the A/C unit we managed to keep the inside temps in the mid 80's all day, running it on low cool, despite the outside temps in the high 90's.  When dusk came and the temperatures dropped down in to the low 70's (and down to the 60's during the night) the thermostat on the A/C unit turned the compressor off.  The next day when the temps began to climb again it turned itself back on.  Nice!


And here is the lovely egg Big Red left for us as a 'Thank You' for her new A/C unit...


So yes, I may be the crazy chicken lady, but my chickens are probably the happiest chickens in the state of Arizona!


I bought these cool tote & grocery bags for myself recently...Now I think it's even more appropriate than the day I bought them, Ha ha ha!!


Click the bag pictures if you would like to buy one too!

Keeper of 1 husband, 2 grandkids, 3 dogs,
3 cats, and 17 Chickens!
 
Follow on Bloglovin


Did this post stir something inside of you? If so, Please leave me a comment, I would love to know what you're thinking!!!
 
I shared this post on the following fun Blog Hops:  "From the Farm Blog Hop", "Backyard Farming Connection Blog Hop","Clever Chicks Blog Hop", and "Down Home Blog Hop"

Thursday, June 13, 2013

Experimenting with Growing Chicken Fodder in a Jar

I feel like a mad scientist with all of the experimental seed sprouts I've been growing lately.  I'm in search of the best fodder, that grows fast, grows big, the chickens love it so much they are waiting at the door when they see me coming towards them with sprouts.  I want to learn what grows best by the easiest method possible in my climate.  That sounds like a lot of requirements but I bet I can meet most of them if I just keep working at it.

I told you about my experiments with wild rice and wild bird feed in baskets.  The reason I chose those to items is because that is what I already had available in my pantry.  I didn't have success with the wild rice but the wild bird seed was a bit more promising, however I think bird seed just grows better in the dirt.  That's why I planted a mixture of wild bird seed and pasture grass in the grazing frame I built inside the chicken run.

I wanted to try growing wheat, but I couldn't find any locally and we live so far outside the city that I wasn't interested in the 1-1/2 hour to 2 hour drive to town to try and find it.  Nor did I need a 50 lb bag for experimenting.  Until I know that I can successfully grow anything I am only testing small amounts.  So I decided to order a 5 lb bag of organic, non-GMO Hard Red Wheat from Amazon.  Yes, I know I could have bought a 50 lb bag for only a few bucks more (or a little over double the price of the small bag if you add gas to get to town and back), but like I said, I don't want 45 lbs laying around if my experiments are not successful.

So my bag of wheat was delivered today...gotta love Amazon Prime Free 2-day shipping!  I was anxious to give wheat a try because from what I have read lately, wheat seems to be the most popular fodder, and just might meet all of my requirements.  The tough part will be the method.  I have been using the baskets but I just learned about another method that sounded fun too where you grow your seeds in a glass jar.  So I thought I would try this method first, then test it in a basket and compare the two.

As typical, I cannot remember where I first read about this.  I swear I cannot remember anything these days.  (Menopause is such a wonderful stage in every woman's life...Not!)  Anyway, if I remember where it was later, I will update this post.  But basically you soak the seeds in a glass jar overnight, then you rinse them out twice a day.  I think I can handle that.  So when my wheat seeds arrived I already had my big jar ready.  Some folks use quart-sized mason jars, but I like this big jar, so for my experimentation phase I am using it instead.

I poured in 1 cup of wheat then filled the jar with water.  I swished it around to thoroughly wet all of the seeds.  To make it easy to drain and rinse the seeds without losing them by accident, I put a double layer of cheese cloth on the top and tied it on with gift ribbon.  I didn't have a rubber band that big (which would have worked nicely), nor did I have my twine handy (because I was using it out in the garden earlier and forgot to bring it in).  Besides, the gift ribbon made it look kind of pretty don't you think?

Soaking Wheat Seeds. *Note the lid is not tightened, just sitting on top.


The next day I rinsed the seeds and left the jar laying in such a way that any excess water ran out the cheese cloth covered top.  Letting seeds sit in standing water will aide in creating mold...you don't want mold in your sprouts.   Note that I did not add bleach to my soaking water.  Some people have suggested doing that to prevent mold, stating that it will all be rinsed away by the time the fodder is big enough to give to your chickens.  My thought is that if I am using organic, non-GMO wheat...why would I add a chemical like bleach in the first stage (or any stage) of this process?  The key to preventing mold will be to not allow standing water.

The rinse process is simple.  Each morning and evening I just fill the jar with water (right through the cheese cloth covered on top), gently swish it around and pour the water out, then I rinse it one more time, and drain the water out again.  Then I place the jar at the 45 degree angle to allow any extra water to drain out of the jar.  

In this drawing, the angle from line A to B is 45 degrees
You may need to use some props to get your jar to stay at the 45 degree angle.  I use a large serving bowl and a shoe box next to it and it works just fine.  If I am pleased with this growing method and decide to go into serious production mode, I will design a simple stand for my jars that will hold however many jars I need to make a complete cycle of crops.  So if it takes 7 days for these sprouts to reach the stage that I would feed them to my chickens, then I will use 7 jars, then when one is fed to the chickens I will clean it out and start a new batch.  So if/when I get to that stage I will share my stand design with you so you can build one too if you like.

Here we are at the beginning of Day 1 (after the initial soak):
 

Here is a picture in the morning on Day 2.  See the tiny little light-colored sprouts beginning to grow out the end of the seeds?


Here is a picture from the morning on Day 3, right after the first rinsing. You can really see the little sprouts now.

And Day 3 in the evening...see the growth?


Oh my, look at these sprouts on the morning of Day 4!  To give you some perspective on the growth, the soaked seeds took up no more than 1/4th of the total space in the jar, and now the sprouted seed that are all entangled together take up about 2/3 of the jar!


And look at a close up of the sprouts.  They have been just the long white colored root-like stems and now I am beginning to see shorter, stouter greenish stalk-like stems. Hmmm this is so interesting!

I bet the chickens would love to have some of these sprouts right now for a fresh cool treat...but I am going to let them go another day or two, to see what will come of these new stalks developing.  Can't wait to try sprouting these in baskets too.

Day 4 PM, nearly full:
Day 4 PM nearly full jar.


Day 5 (My camera ate the picture of the full jar this morning) The Wheat sprouts have grown so much and the new green stalks are about 1/2" long now.  They have completely filled my big jar and were protruding out the cheese cloth end, so it was time to take them out even if this is earlier then I wanted.  I feel they could have grown a little fatter stalks if they had another day or two.   

Day 5 Sprout, stalk about 1/2" long.


I had to really work to pull half of the bundle of sprouts out of the jar, thank goodness I used a wide mouth jar!  Once out, I ran water over them while I gently de-tangled the mass of sprouts.  I placed them on a glass dish and served them up to the chickens.  They didn't know what to do with them.  I think they might have even been a little afraid of them too. Haha!  So I broke off a few little sprouts and offered them to the chicks.  They ate them when I offered them sprouts one-by-one.  Even chased each other around when they had a piece hanging out of their mouths.  It was really funny.  I would have recorded it by I didn't have my camera handy.

Day 5 Wheat Sprouts served up to my chickens.

I broke up the remaining half of the sprouts into two baskets to see if I could get them to continue to grow...I don't have much hope of that because they did not start in the baskets.  But one thing I did learn is that wheat sprouts and grows nicely.  I think I will add some to my grazing frame and see how well it does there.

So to summarize what I learned from this experiment...

1.) Wheat Seeds germinate easily.

2.) Don't put too many seed in the jar.  I used less than 1/4 of the jar in seeds but the sprouts quickly grew too big for the jar.  I would have liked to allow the sprouts to get a little bigger but the chickens enjoyed them just the same.

3.) Comparing how quickly my other seeds dried out in the baskets, it seems that the jar holds more moisture around the seeds without them standing in water.  The jar is practically upside down all the time so the water runs right out the bottom through the cheese cloth, but the glass holds the moist air...which seems to help them not dry out.

4.) When I want to quickly grow sprouts for my chickens, this is the method I will use.


Keeper of 1 husband, 2 grandkids, 3 dogs,
3 cats, and 17 Chickens!
 
Follow on Bloglovin


Did this post stir something inside of you? If so, Please leave me a comment, I would love to know what you're thinking!!!
****
I am so honored that this post has been featured in the "HomeAcre Hop" on Thursday, June 20th!   Thank you ladies!!!

Everything Home with Carol
Link will be live on Thursday, June 20th.