Friday, July 26, 2013

My 13 Week Old Barred Rock Cockerel is Fertile and Working It!


My 13 week old Barred Rock cockerel is fertile!!!  I have witnessed him mounting my laying hen recently and he appeared to be getting the job done, if you know what I mean.  He has been trying to mate with my pullets, who are also 13 weeks old, but they just run from him.  My laying hen Big Red, who is 8 months old and has been laying for a few months, knows what she is expected to do, so she stops and squats for him.

Barry my Barred Rock cockerel at almost 12 weeks old.


I asked around to the more experienced chicken keepers and everyone kept telling me that he couldn't be fertile at only 13 weeks.  Leigh (aka Bulldogma) from Natural Chicken Keeping blog said she wasn't sure if it was possible for him to me fertile at only 13 weeks, but did say that the general rule is that if he has the 'gymnastics' down, then he is probably fertile.  She has chickens about this same age so she wanted to know the answer to this question as well.  She suggested that I collect my hens eggs for the next week and check them for the fertile 'bullseye' when I cracked them for breakfast.

I collected Big Reds eggs for the next 4 days.  Two were double yokers (she drops about 50% double yokers), and two were single yoked eggs.  I cracked them open and examined the yokes...all six yokes had the BULLSEYE!  Which means that Barry is definitely fertile and successfully mating with my laying hen Big Red!  Woo Hoo this is so exciting.

I tried to take some pictures but only had my cell phone handy and they are just not clear enough to see the ring in the picture, however in real-life the rings are very visible.  You can go to Natural Chicken Keeping blog to see what fertile and infertile yokes look like.  She has some very good photos for comparison.

Now to answer the nay-sayers who will say...
  • "You must be off on his age and he is older than you think." I am 100% positive of his hatch date of April 16, 2013, which made him exactly 13 weeks of age when I witnessed him mating with my laying hen Big Red.  
  • "You must have only thought it looked like a 'bullseye' on the yoke." I could clearly see the dot in the middle and the ring around that dot.  It was visible on all four of her eggs (6 yokes due to 2 double yokers).  I even cracked a few store-bought eggs and they only had the single dot.
  • "You must have another rooster that is mating with her." Nope, I have Big Red my only laying hen, and all of my other chickens were from the same incubator hatch as Barry, all born on the same day.  He is the only rooster in the bunch.

To further test my accuracy on the fertility, I placed one of Big Reds eggs in the incubator that I already had running with some shipped eggs.  I candled the egg on Day 3 and saw an air pocket and veins.  I candled the egg again on Day 6 and I saw a 'growing' air pocket along with a little chicken embryo and movement!
 

Interestingly Barry has yet to crow in the morning...not even attempted to yet.  Guess he doesn't feel the need to boast about his man-hood when he is hatching out chicks with my laying hen.  I will keep you posted on the status of my growing little chick in the incubator.  She is due to hatch on August 8th.


  Keeper of 1 husband, 2 grandkids, 2 dogs,
3 cats, and various Chickens!

Follow on Bloglovin


Did this post stir something inside of you?  Leave me a comment, I would love to know what you're thinking!!!

This post has been shared on "From the Farm" Blog Hop.

Wednesday, July 17, 2013

What a Surprise! ~ A Most Uniquely Delivered Compliment

I got the sweetest surprise tonight.  I was just enjoying a little down time with the hubby on the couch, he was reading a book and I was playing catch up with posts from my favorite bloggers.  I saw a recent post by Misty Schutt, who is the extremely funny girl who did the "Hazards of Backyard Hens" video I told you about recently.  If you have not watched it yet, you really need to.  If you have watched it already, go ahead and watch it again...I don't think there is a limit to how many times you can watch it and literally laugh out load.

Anyway, Misty posted a new video on Friday, but I hadn't seen yet because it's been crazy busy around here.  So I am sitting there with the laptop in my lap watching the video entitled "Compliments and Censures" when all of a sudden she gives ME a Compliment right in her video!  How cool is that?  It seems that Misty enjoyed my post about evacuating with 9 chickens, 3 cats, 2 dogs, 2 grandkids, and 1 husband, all in about 30 minutes.  I am so honored that she visited my blog and apparently spent quite a bit of time reading it.

Here is this weeks video by Misty...


Very nice 'Compliment delivery' Misty...Thank you so much!

Keeper of 1 husband, 2 grandkids, 3 dogs,
3 cats, and 17 Chickens!
 
Follow on Bloglovin


Did this post stir something inside of you? If so, Please leave me a comment, I would love to know what you're thinking!!!

Tuesday, July 16, 2013

Hand-Pollinating, Part 2: Tomatoes and Okra

Yesterday in 'Part 1 of Hand-Pollinating' I explained the basics on hand-pollinating plants with a male and female flower, like the zucchini, cucumber, and watermelon, just to name a few.  I mentioned that some plants, like the  tomatoes & okra plant, are what is called 'self-pollinating' in that they do not have separate male and female flowers, they have both the anther and the stigma within the same flower.

Bees help to pollinate these kinds of plants by the vibrations they cause inside the flower with their buzzing.  This vibration causes the pollen to fall from the anther (male part) onto the stigma (female part) within the single flower.  Furthermore, when the bees fly from flower to flower they help to spread the pollen from multiple male parts of the flowers to several female parts throughout the plant.

You can accomplish this with hand-pollination in a few ways.  One method is to gently 'flick' near the blossoms.  A second method is to give each stalk a quick (yet not too rough) 'shaking'.  Both of these methods will help to knock the pollen from one part of the flower to the other part, and possibly even to other flowers nearby.  Watch the YouTube video below for a great visual on how to flick and shake tomatoes (and peppers) to pollinate them.


Prior to beginning to hand-pollinate my tomatoes I kept seeing new blossoms, then a few days later the blossom stem would dry up and fall off.  I was concerned I had some kind of pest in my garden that was killing my blossoms.  That was before my light-bulb-moment when I realized what was missing were the honey bees.  Just a couple of days after beginning to hand-pollinate my tomato plants I discovered my first tomato!  Then the next day I saw another!

My first tomato! Discovered just 2 days after I started hand-pollinating my tomatoes.
My 2nd tomato discovered the next day.

And I began to notice that some of my 'blossom stems' were thickening up, which they apparently do prior to the baby tomato developing so the stem is strong enough to hold the weight of the growing tomato.  I know this now because I monitored one of the thickening blossom stems and watched it turn into a tiny tomato the next day.  You can't see it very well in the picture below, but the blossom stem became thickened, then the next day the blossom began to dry up and out popped a tiny tomato behind it.  No more tomato blossoms dropping off because of lack of pollination in my garden!

Tomato #3 in the works!

The two hand-pollination methods mentioned above worked best for my tomatoes, but I found that it didn't work as well for my okra.  Okra is also a self-pollinating plant but like all other plants, it needs the bees to help stir things up inside the blossoms.  However, the okra blooms seemed to have a much smaller window of time to be pollinated.  So I again used my grandkids little paint brush to 'paint' around inside each flower as soon as I noticed one. [See picture below]


Success!  The day after, the blossoms closed and started to dry up and I could see little okra's growing.  Where I was getting about 1 or 2 okra's each week, suddenly I now have about 5 of them growing at one time, and new okra blossoms are opening each day.  So instead of 1 fruit on most of the plants, I now have multiple fruits on all of the plants!  I am becoming quite the bee-surrogate.


You can see on the (slightly blurry) picture above that I have one growing okra, one blossom, and three tiny blossoms-to-be opening in the next day or two.  This is all after just 3 days of hand-pollinating them.  Prior to that I would maybe have one blossom that might have turned into an okra (but most just dried up and fell off), and no new babies until after I harvested that lone okra.  It was pretty dismal, especially since okra is one of my most favorite veggies.


On a side note...Prior to beginning hand-pollination in my garden I realized that the scorching sun and steady temps well over 90 degrees every day for more than a month might be taking a toll on my plants.  This is a problem for those of us who garden in Arizona.  So I added this shade cover over most of my plants.  I didn't worry too much about the zucchini plants on the far right end because they have such huge thick leaves that the delicate blossoms and fruit underneath are pretty well protected from the harsh sun.  I can always extend the shade later if needed.

Finished putting up my garden shade just before sundown.

Are you having problems with lack of bees where you live?  What are you doing about it?  Besides hand-pollinating your plants, visit this website to see how you can Help Save the "Bees Before its Too Late".


Keeper of 1 husband, 2 grandkids, 3 dogs,
3 cats, and 17 Chickens!
 
Follow on Bloglovin


Did this post stir something inside of you? If so, Please leave me a comment, I would love to know what you're thinking!!!

Monday, July 15, 2013

Hand-Pollinating, Part 1: Zucchini, Cucumbers, Watermelons


It seems that my garden is taking forever to get going this year.  Maybe it has taken this long in the past, but this year it just feels longer.  Or perhaps there is something else going on.  I used the best soil, compost, and manure in the mixes recommended by the organic nursery.  I have given my plants compost tea, which really seemed to help some of my plants.  My Zucchini and watermelon just took off after I gave them the tea.  I also gave them an Epsom salt water solution.  That seemed to kick my tomato, okra, and cucumbers into gear.  But I was still not getting veggies yet, well not enough to brag about (although I did brag about the few tiny ones I got.)

Funny how the most obvious things seem to pass right by you sometimes.  I was doing my morning routine of checking my garden for any signs of pest, checking the soil for moisture, and looking for some sign of a veggie.  While digging around in my massive zucchini leaves, looking at the beautiful orange flowers, I realized that I had no bees.  None.  I have had a few wasps, but they don't do the work of bee's.  That explains why I have not had any veggies yet (other than a handful of okra and one zucchini weeks ago).  My plants are not getting pollinated!

Click the picture to learn about honey bee pollination.

Since I have never had a garden without bees I wasn't exactly sure what the bees do to pollinate my veggies, so I had to do some research on each of my plants to see how it's done.  I learned that some plants need the bees 100% because they produce a male and a female flower, and the pollen cannot get from one to the other without the bee. Basically it goes like this: The bee crawls around in a male flower and gets pollen from the male flower stuck on his legs and body.  Then he flies to the next flower, which might be a female flower, and the pollen brushes onto the stigma in the female flower.  The female flower is now pollinated and begins to grow fruit (or a veggie) where the flower was.  I also learned that some other plants are what is called 'self-pollinating' meaning that they don't have separate male and female flowers, they have both male and female parts within one flower.  But even these plants need a bee to help pollinate.  Some of the 'self-pollinating' plants that I have in my garden are the tomato and the okra.  I will explain how to hand-pollinate 'self-pollinating' plants in my next post, for this post I am going to focus on 'hand-pollinating' plants with a separate male and female flower.

To 'hand-pollinate' you first have to identify the male flowers from the female flowers.  You wont grow anything if you are just moving pollen from one male flower to another male flower.  To help you identify which flower is which, lets use the zucchini as our example.  Below you see a Male Zucchini Flower.  Notice that the male flower has a long thin stem behind it.


Below is a Female Zucchini Flower.  See that tiny zucchini behind it?  If this flower does not get pollinated within a certain window of time (usually a few days with zucchinis) then it will shrivel up and die...it will not continue to grow in to a full zucchini.  If you have noticed tiny zucchinis starting to grow then they suddenly start turning yellow near the flower end and shrivel up and die...its because they were not pollinated.

Female Zucchini blossom, see the tiny zucchini behind the flower?

A baby zucchini that shriveled up and died because the blossom did not get fertilized. Actual size is about 1-1/2" long, I zoomed in to get a good picture.

Below is a female zucchini flower that will probably be opening up tomorrow or the next day.  Do not manually open the blossom, when it is ready to receive pollen it will be open like the flower above.  I noticed that in my garden they tend to begin opening up in the morning about 7:30-8:00am when the sun is fully up, but it is not hot yet.


Now that you know which flower is which, lets begin hand-pollinating.  With a tiny paint brush (I got mine out of my grandkids art supplies) you brush deep inside the flower.  [See the picture below] Towards the back you see the anther that is covered in a golden yellow sticky dust -that is the pollen.  If you brush the anther, the pollen sticks to your brush. 


Next you go to the female flower. [See the picture below] Just as you did with the male flower, you brush around deep inside the flower on the part called the stigma.  The sticky pollen will come off your brush and stick to the stigma.  You have now pollinated your plant! I usually repeat this every day that the flower remains open.  Now watch this little zucchini behind the flower.  In a few days the flower will begin to dry up and the zucchini behind it will start to really grow.  Soon you will be harvesting that zucchini.


If you have more than one male flower open, it's a good idea to gather pollen from more than one male, and deposit the pollen into more than one female.  Spread that pollen around like the bees do!  Below you can see two female flowers that have been pollinated and the blossoms are beginning to shrivel up.  See all of the other baby zucchinis developing in there?  It seems that once I started hand-pollinating the plant, it just went wild producing more babies.


Look at all the baby zucchini's all of a sudden!

My watermelons and cucumbers are hand-pollinated just like the zucchinis, they will have a male and female flower, with the tiny fruit being behind the female flower.   My watermelons and cucumbers got off to such a slow start this year because the cats ate the tops off the plants.  I had to sow new seeds directly in the garden since I used up all of my starter plants.  Right now my watermelons are still in the vine growing stage and not blossoming yet, while my cucumbers are very small little plants, they are already blooming.  So far all of the flowers are only male flowers.  I am watching them closely and will begin hand-pollinating them as soon as I see a female flower.


I'm so sad that the bees are not here this year.  Now I see how we have sort of take them for granted.  I didn't help matters when I didn't plant any bee attracting flowers around my garden this year.  Next year I am filling my yard with wildflowers before the first plant goes in the garden itself, so hopefully this wont be a problem again next year.  Click on this link to learn more about how bees help to pollinate 1/3 of our food produced, and to learn what You can do to "Help Save the Bees Before its Too Late."

Keeper of 1 husband, 2 grandkids, 3 dogs,
3 cats, and 17 Chickens!
 
Follow on Bloglovin


Did this post stir something inside of you? If so, Please leave me a comment, I would love to know what you're thinking!!!

Sunday, July 14, 2013

Lazy Sunday Afternoons Around the House...Javelina's, Cats, and Scorpions


A Javelina family stopped by this morning for a snack.  I toss my garden clippings outside my garden area and I think they enjoy finding the little treats.  Since the recent wildfire I am sure they need all the extra greens they can get.  It's a give 'n take relationship we have with them.  I leave them a few garden clipping, and they eat the ugly weeds that grow up around my yard as they pass through each morning and evening.  See the daddy there (half in the picture on the far right)?  He is pulling those weeds growing there by my water faucet. Such a cute baby don't you think?

Mom, Dad, and baby Javelina on our patio.
Here is what my cat does when the javelina's pass through...See him up there in the pine tree?  He is about 10 feet high.  He will play up there for quite a while.  Walking from branch to branch, sometimes just resting on a branch watching the goings on down on the ground.  I bet the birds are shocked to find a big cat sleeping in their tree, ha ha.

Marvin up in the pine tree?  Walking around on the branches or even taking a nap.

We have three cats and they all have such interesting personalities.  But the last few days it seems that Marvin is the only one being caught in his antics by my camera.  Besides branch-walking, another quirky thing he does is collect all of the bath rugs into a pile.  Getting them in the pile is rather entertaining because he stands on the rugs and jumps in the air while doing a bucking bronco bull type movement to kick them behind himself.  Then after all that work he needs to take a nap.


Now I have no idea which one of the cats left this little treasure for me on the coffee table!  It about scared the bagezzers out of me until I discovered it was very much dead.  I almost sat my glass on top of it.

Dead scorpion that one of my cats left for me on the coffee table.

This is the 4th dead scorpion my cats have left out for us to find.  One of them even had his stinger tail removed.  If you have scorpions (and we do here in AZ) then you either need a cat or a chicken in your house...since the hubby probably wouldn't let me bring a chicken in, I will have to let the cats take care of these creepy-crawlies for me.

What's happening on this wonderful Sunday afternoon around your house?

Keeper of 1 husband, 2 grandkids, 3 dogs,
3 cats, and 17 Chickens!
 
Follow on Bloglovin


Did this post stir something inside of you? If so, Please leave me a comment, I would love to know what you're thinking!!!

Saturday, July 13, 2013

I made Blackberry and Strawberry Jam for the First Time!

I consider myself to be quite the domestic person.  Any of my family and friends could vouch for me too, but I have never canned food.  I have dried and frozen foods from my garden, but have not canned.  I really wanted to learn, so I decided to start with one food that others 'in the know' say is easy to do...making Jam.  I love Blackberry and Strawberry Jam and since both fruits are in season right now, I decided they would be the first jams to make.  I've never been able to get strawberries to grow for me, so I had to get my strawberries from someone with a greener thumb than I.  While I was there I got a huge batch of blackberries too.


Like I said, this was my first time making jam...of any kind.  I was more than a little nervous about messing it up and wasting all of this beautiful fruit.  To help me, I bought an awesome book about canning from Ball, the leader in the Canning industry.  The book is called "Ball Complete Book of Home Preserving" available at Amazon for under $18.  Since they've been in the business forever, I figured their recipe book must be pretty good.  And fortunately, they speak in terms a newbie canner like myself can understand.


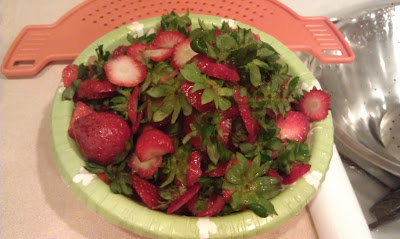
It looked pretty simple, just rinse, de-stem, and dice the berries.


Mash the berries.


Cook fruit with Pectin and sugar...(lots of sugar).   While also boiling jars and lids in a separate pot.


When the fruit finishes cooking, spoon off the foam, then pour the cooked jam into your jars, put the lids on hand tight, and place in the hot water bath pot to 'process' for a short time.


Set the jars out to cool for 24 hours.


The next day you have these beautiful jars of jam ready to enjoy yourself and share with friends.


The chickens got to enjoy these strawberry parts 'n pieces.


And what is the best way to enjoy good Jam?  On fresh baked Artisan Bread of course...I had to bake a few loaves just for the Jam...mmmm!


Keeper of 1 husband, 2 grandkids, 3 dogs,
3 cats, and 17 Chickens!
 
Follow on Bloglovin


Did this post stir something inside of you? If so, Please leave me a comment, I would love to know what you're thinking!!!

Friday, July 12, 2013

Feeling Wild & Dirty tonight? ~ Recipe

I recently made my world famous (well at least around my house) Wild & Dirty Rice for dinner!  I was craving wild rice but wasn't sure what I would make as the main course that would be good with wild rice on the side.  I also didn't have enough of any one vegetable to make with a meal, because I only had a little of this, and a bit of that left over.  Then it hit me, why not make Wild & Dirty Rice.

Wild & Dirty Rice

The beauty of this meal is that it is so easy to cook, makes very little mess, and you use what you have on hand, therefore it's never exactly the same twice.  I had exactly 1-1/2 cups of wild rice so I put on a pot of rice to cook.  [1-1/2 cups of rice, 3 cups of water, and 2 beef bullion cubes (if I am using beef with the meal)].

When the rice is almost done...

In a deep skillet I brown a pound of extra lean ground beef, sprinkling in a bit of Mrs Dash Onion Herb seasoning and some Creole Seasoning (both to taste).  Once the meat is browned I added the following:

These ingredients are what I had on hand, feel free mix it up and add what ever you like.

2 Diced up green onions
1/2 a large carrot, (grated)
1 large handful of diced frozen green bell peppers (or use fresh)
1 handful of diced frozen red bell peppers (or use fresh)
5 Okra's from my garden (sliced)
1 can Diced Tomatoes (canned because mine are not ready in the garden yet)
1 left over ear of corn (cut corn off the cob or use a small can of corn drained)
Garlic Powder (to taste)
Pepper (to taste)
A little more Creole Seasoning (to taste)


Cook til everything is heated through.  Then add 1 head's worth of broccoli florets to the top, put a lid on, turn the heat down to low, and simmer for 10 minutes.

Add the cooked wild rice to the meat & veggies, mix together and serve!  Super easy, super delicious!

The Key ingredient in my Wild & Dirty Rice


  Keeper of 1 husband, 2 grandkids, 2 dogs,
3 cats, and various Chickens!

Follow on Bloglovin


Did this post stir something inside of you?  Leave me a comment, I would love to know what you're thinking!!!

Thursday, July 11, 2013

Making Compost Tea ~ for your plants to enjoy, not you!

Every time I learn about some new DIY thing, I just have to try it.  Recently while reading about composting (which I want to start doing) I came across an article about making Compost Tea.  Which lead me to another, and another, so I picked up a little information here and a little more there.    Then I decided to try to make my own.

If you want to make compost tea with me you will need to gathered the following items:


First I filled the bucket most of the way up with water from the hose.  Since this is probably chlorinated I put the air hose in the bucket, held down by the rock, and let it bubble for about 4 hours to evaporate the chlorine.  It's important to keep the bucket in a warm location but not in direct sunlight, otherwise you will be promoting algae growth and that is not good for composting tea.  I put mine out on the patio, under full shade.
 

Then I added the compost to the water.  I didn't bag it like some suggested, since I was only making 5 gallons I didn't think this would be necessary.  I added 1 ounce of Molasses and stirred it all up.  Then I placed the tubing at the bottom again, and held it in place with my big rock.  And just let it 'steep'.


Some instructions suggested that I stir it daily, others didn't mention stirring, and since I had such a high powered air pump that was really keeping the water moving, I didn't bother with the stirring.  Three days later my compost 'Tea' was done steeping.  It looked like rich, dark tea coffee, but smelled like poo (not literally like poo, but I am hyper-sensitive to smells).

I turned off and removed the pump and air hose.  Then carried the bucket out to my raised bed garden, splashing some of this nasty smelling tea on my leg...oh joy! 

I then let the tea sit for a about 20 minutes so all the solids sank to the bottom.  You are suppose to then pour it through a strainer and then dilute the tea with 1 part Tea and 10 parts water.  Well, I didn't have any more buckets for this whole straining and diluting process so I modified those instructions.  I advise you to gather 2 buckets in the beginning (one for steeping the tea, one for straining then diluting the tea) so you don't have to make the modifications that I did. 


It is important to use the tea right away because without the air flow, the good microorganisms and fungi will begin to go to sleep.  It is also very important that you do not pour the tea directly on your plant as it could burn your plant.  Since I did not have extra buckets I had to dilute my tea by using a bowl to scoop out some tea, then add water to it before pouring at the base of each plant.  Not a perfect science, but close enough.


I think my plants appreciated the sip of Compost Tea as much as I enjoyed my glass of mint tea that I brewed for myself once this task was complete.


  Keeper of 1 husband, 2 grandkids, 2 dogs,
3 cats, and various Chickens!

Follow on Bloglovin


Did this post stir something inside of you?  Leave me a comment, I would love to know what you're thinking!!!


*Disclosure, this post contains affiliate links.  If you click on my links and make a purchase of these items online, I will receive a very small commission on your purchase.  -Thank you in advance :-)

Monday, July 8, 2013

Lacto-Fermentation ~ Making My Own Fermented Chicken Feed

As you've probably guessed by now, I love experimenting with new things.  Especially things that benefit our lives or our pets lives.  Recently while researching about the best feed to give your chickens I kept seeing the mention of 'fermenting feed'.  When I hear the word 'fermenting' I think of fermenting to make alcohol, but I quickly learned there are several kinds of fermentation.  The one that I am most interested in was 'Lacto-Fermentation'.

What exactly is 'Lacto-Fermentation'?  The best explanation came from the Natural Chicken Keeping blog, as they explain that "Lacto-Fermentation uses naturally occuring bacteria to partially break down the food, improving its enzyme content and increasing its levels of vitamins B, C, and K.  It also makes food more digestible, and boosts the "usable" protein level by about 12%."  This means that by fermenting your chickens food you are essentially enhancing their food to make it easier for them to digest and increasing the nutritional value of the food.  I've heard from many chicken keepers that the chickens will end up eating less food in the long run, while getting so much more out of the food.

This sounded like an experiment that I definitely wanted to try.   I read the Natural Chicken Keeping blog, as well as many other similar articles about how to properly ferment chicken feed.  The methods all vary just a bit, but follow some of the same basic principles, so I kind of combined all of their basics and created my own variation of chicken feed fermentation.  Here is what I did to make my own fermented chicken feed.

First I needed a container to ferment my feed in.  With this being my first experiment I didn't want to spend any money on supplies until I knew if this would work for me and if my chickens even liked.  So I started with a large clear glass mixing bowl.  You can use glass, lead free ceramic,  or food grade plastic, but do not use metal because the high acid content can interact with metals.  I prefer glass, especially clear glass, so I can watch what's going on in the fermentation process.

My chickens currently eat dry crumbles so I started with that.  You can use what ever dry feed your chickens eat now.  For my test batch I used 2 cups of crumble feed and 1/4 cup of wheat seeds, 1/4 cup of barley, plus a 1/4 cup of scratch.


I mixed these dry ingredients up in the bowl then covered them with about 1' to 1-1/2" of unchlorinated water above the level of the feed.  I have a Reverse Osmosis machine that filters chlorine out of my water but if you use regular tap water, you must assume is has some chlorine added by your water municipality.  To de-chlorinate your water just fill a pitcher of tap water and let it sit out over night.  The chlorine will naturally evaporate.  You do not want to use chlorinated water because it will kill the good bacteria that you want to grow in the fermentation process.


Once I added the water to my dry feed, I stirred it gently to make sure that all parts of the dry feed were wet, then I put a lid over the bowl.  It does not need to be air tight, I just placed a dinner plate over my bowl and it worked fine.   You need to monitor the water level over the first 24 hours because the dry food will swell as it soaks up the water.  If the water level gets too low, just add a little more unchlorinated water.  You should also gently stir the fermenting feed every 2- 3 hours during the first several days, (don't worry about it at night).

By the 2nd full day I began to see bubbles forming on the top of the water.  This is caused by the bacterial giving off carbon dioxide.  It also began to smell kind of sour, which reminded of me of the smell of my fresh sourdough bread dough before it goes in the oven.  It is not stinky and rotten, just kind of sour.  The slightly sour smell and the bubbles are a good sign that things are going well.


Once I reached this stage I wanted to feed some of it to my chickens.  I used a screened ladle to scoop out some feed from the bottom of the bowl and let most of the water drain out before placing it in my serving dish.  Then I took it out to feed to my chickens for the first time.   Now before I tell you about their reaction, let me tell you what they usually act like when I have give them something new.  They stand way back from the dish looking at it with total suspicion mixed with disgust.  After a moment, if no one is brave enough to approach the dish, I will take a small bit and offer it to one of the chickens.  The small amount doesn't seem so scary so they take a bite, then come back for more...then the others will come try it too.  It is usually the second (or even the third) time that I offer them something new before they all eagerly eat it, so I didn't expect anything different this time.


However...as soon as I sat the dish of fermented feed on the ground they all gathered around and began eating it like crazy!  I don't know if they smelled it and liked the smell, or it was the colorful variety that was just too appetizing to them or what, but I was thrilled that they liked it so much.  They ate every last little morsel of food in the dish within just a few moments.  So now I knew they liked it, and that my next serving needed to be bigger.


I fed it to them again that evening at around 6:30 pm.  That's when they seem to eat the most food and get their craws really full for the night, so I wanted them to go to bed with fermented feed tonight which would be easier for them to digest.  When I served their evening helping of fermented food they once again ate it up right away, and they didn't leave much in the dish this time so now I knew how much was the right amount to satisfy them.

Since they loved it so much and it was so easy to make, I bought a 2 gallon glass jar with a heavy lid and started a whole new -much bigger- batch.  This time I added some barley and a little wild bird seed treat (seeds, millet, fruits, etc) to the mix as well.  The sunflower seeds floated to the top (you don't want any of the food above water) so I scooped them out with a screened ladle.  I added the first batch to this second batch, which helped to give the 2nd batch a kick-start.  It was bubbling by the next morning.  This is an important reason why you don't throw out your old water when you start a new batch. (unless the first batch went bad, in that case start all over again)  What I do is keep a bowl of the dry mix next to the fermenting jar.  As I scoop out wet food, I pour in replacement dry food.  Remember that the dry food swells when it soaks up the water, so monitor the water level at all times so it is always at least 1" over the level of the feed.


After feeding fermented food to my chickens for several days I noticed that they seemed perkier.  I think this feed must be making them feel better.  I bet they are also staying a little better hydrated in this AZ heat because they are getting such a high water content in their food.  And I don't know if its my imagination, but after just two weeks of fermented feeding, their feathers look shinny and more full of color.


There are two drawbacks to feeding my chickens fermented feed.

1. When we were evacuated for the fire, I didn't bring the huge fermenation jar with us.  So I only had dry crumble feed to give them.  When I offered it to them they acted like I gave them chalk to eat.  Barry (my cockerel) showed his distaste by standing in the feed dish and kicking the dry feed out onto the ground.  It looked like he was trying to dig down to find the good stuff.  I had to wet their food to get them to willingly eat it.

2. They loved fermented feed so much, and quickly got use to me bringing them a dish in the morning and evening.  So by the third day, just after sunrise (and each morning since) Big Red gets up on the feed can by my bedroom window and pecks on my window while she squawks loudly.  I imagine she was saying, "Uh Mom, are you still sleeping? We are up and ready for breakfast!"

"Uh Mom, are you still sleeping? We are up and ready for breakfast!"

I am glad they like it so much, and I really don't mind the early morning wake up call.  It is kind of sweet to roll over and see her peeking in my window.  So now I keep a big jar of fermenting feed on my counter by my sink.  It sits there next to my stacks of sprouting seeds that they love to have for a fresh treat.  It may not look to pretty sitting there between my kitchen and living room, but it does make an interesting topic for discussion when company comes.

If you would like to try fermenting feed for your chickens, I recommend that you visit the Natural Chicken Keeping blog and read their 3-part series on the Benefits of Lacto-Fermention (how it benefits your chickens),  Fermentation Basics (the science behind fermenting) , and the complete How-To fermenting instructions.  After reading about fermenting feed from multiple sources I found theirs to be the best.  Be sure to read the comments after each article because they have addressed updated information in the comments as well.

Keeper of 1 husband, 2 grandkids, 3 dogs,
3 cats, and 17 Chickens!
 
Follow on Bloglovin


Did this post stir something inside of you? If so, Please leave me a comment, I would love to know what you're thinking!!!